
SW1 L4-1.9L SOHC VIN 8 (1996)
IMPORTANT:
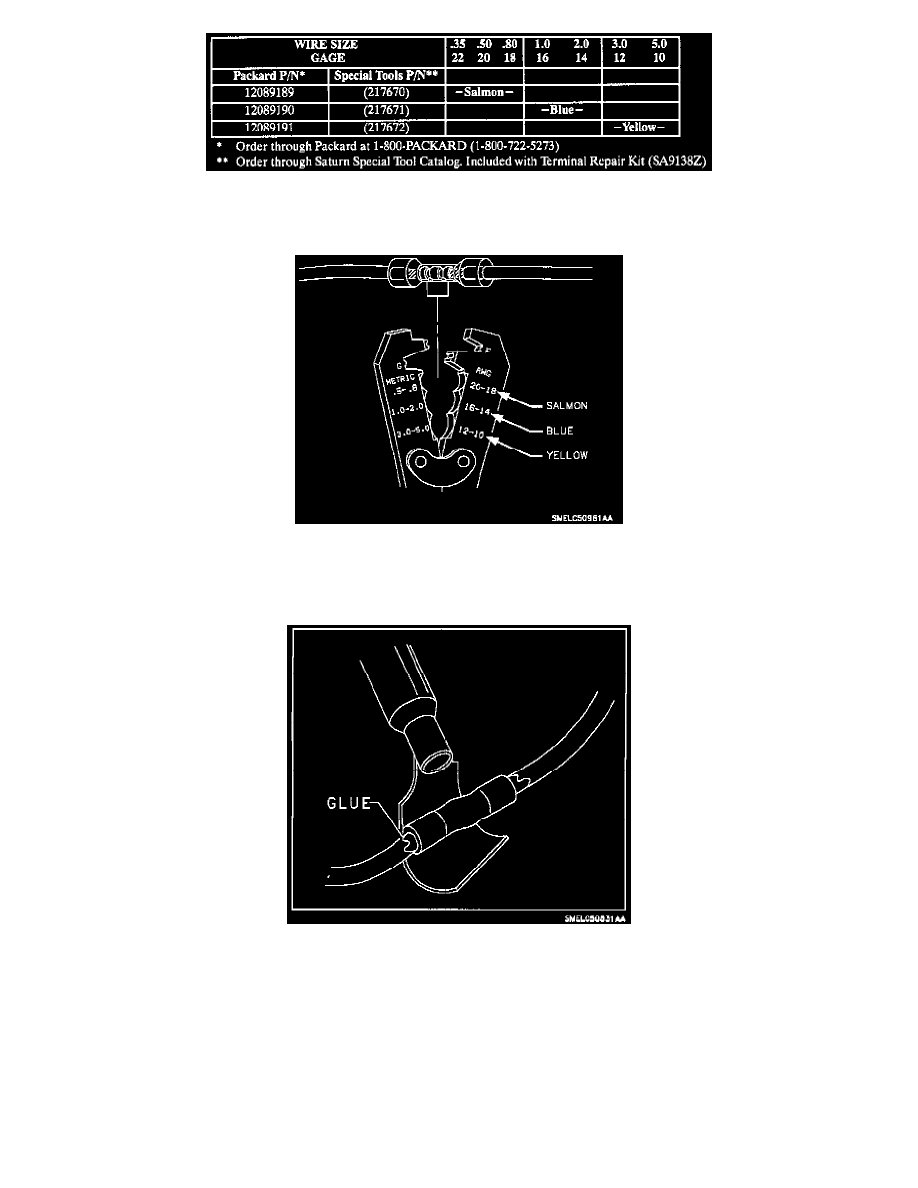
When using the salmon splice sleeve with .35 (22 gauge) wire, remove 19 mm (3/4 in.) of insulation. Bend the stripped portion in half to double the
thickness of the wire going into the splice sleeve. Twist the stripped, doubled wire and insert into the splice sleeve.
10.
Hand crimp sleeve using the appropriate crimping tool. Gently tug on wires to make sure they are secure before applying heat to them.
CAUTION:
DO NOT USE A MATCH OR OPEN FLAME TO APPLY HEAT TO SPLICE SLEEVE.
11.
Apply heat using Ultratorch(R) or some other device, heating to 175°C (347°F) until glue flows around edges of sleeve.
12.
Check for continuity in the wire.
13.
Install 101 mm (4 in.) of conduit (P/N 21023495) to I/P harness. Make sure to position conduit over clutch pedal pivot clip.
14.
Tape conduit and fasten wire harness clip to harness and spaceframe
15.
Using Saturn P/N 08905262, wiring harness clip, install clip on harness and insert rose bud into hole that the previous strap was removed from.
16.
Enable SIR system. (Refer to "Enabling the SIR System" procedure in the "SIR Service Manual.")