
SW1 L4-1.9L SOHC VIN 8 (1996)
Brake Master Cylinder: Service and Repair
Master Cylinder Disassembly/Assembly
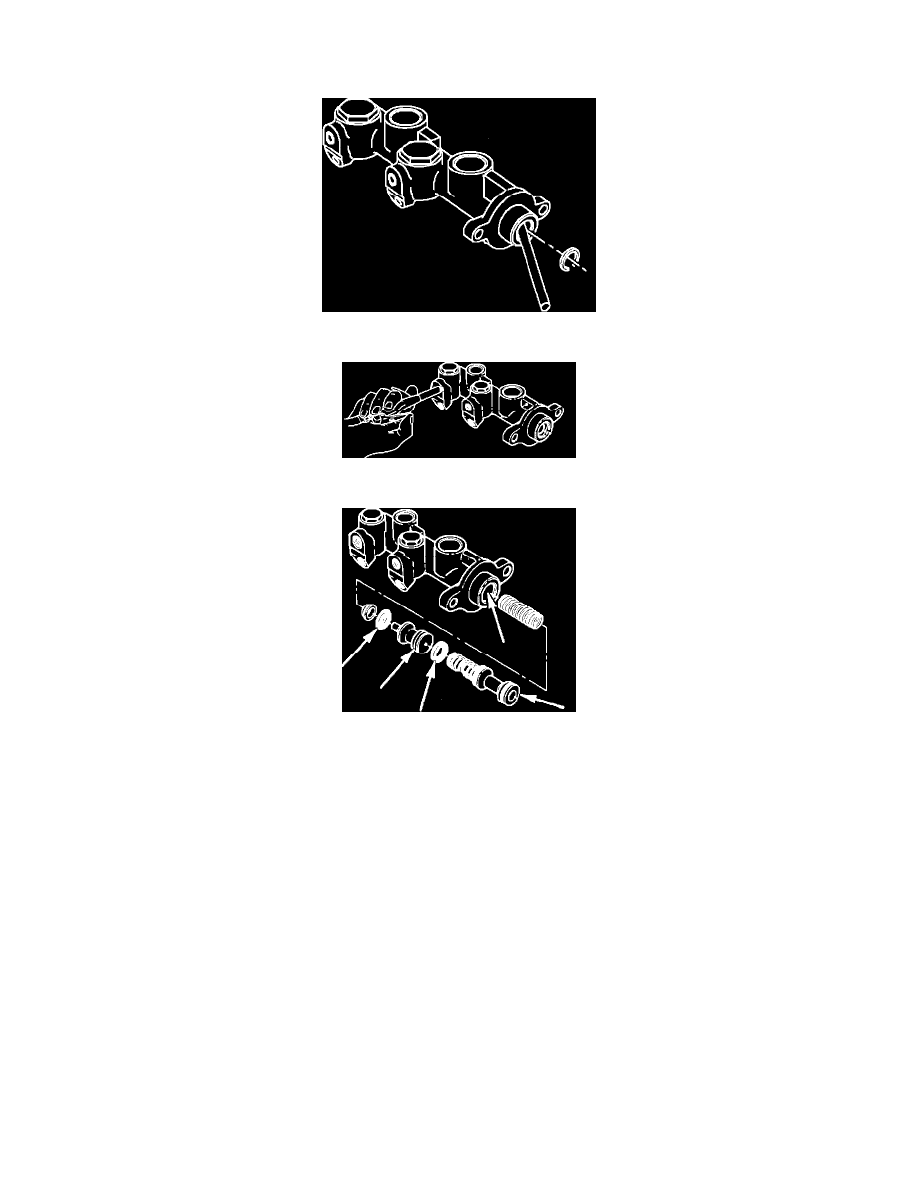
Fig. 2 Master Cylinder Retainer Clip Removal
Fig. 3 Master Cylinder Piston Removal
Fig. 4 Master Cylinder Piston Assembly
DISASSEMBLE
1. Remove master cylinder from vehicle as described under Component Replacement.
2. Wipe reservoir cap clean, remove cap and inspect reservoir cap and diaphragm for cuts, nicks or deformation. Replace damaged parts as
necessary.
3. Drain brake fluid from reservoir.
4. On models equipped with anti-lock brakes, remove modulator and motor pack from master cylinder. Refer to Antilock Brake System. See:
Antilock Brakes / Traction Control Systems
5. Remove brake fluid level sensor.
6. Remove reservoir as described under Component Replacement.
7. While depressing master cylinder piston, remove retainer clip, Fig. 6.
8. Apply low pressure non-lubricated compressed air into upper brake fluid output port, Fig. 7. This will facilitate removal of primary and secondary
piston assemblies as well as spring and spring retainer.
9. Clean all parts with clean denatured alcohol. Dry with unlubricated, low pressure compressed air. Blow out all passages in cylinder body.
10. Inspect pistons and seals for nicks, cuts, cracks, wear or corrosion. Replace all worn or damaged parts.
11. Inspect master cylinder bore for scoring or corrosion. If cylinder bore is damaged, replace master cylinder. Do not hone master cylinder bore.
ASSEMBLE
1. Lubricate secondary seal and master cylinder bore with clean brake fluid.
2. Install spring and secondary piston assembly into master cylinder bore, Fig. 8.
3. Lubricate primary seal and master cylinder bore with clean brake fluid.
4. Install primary piston assembly into master cylinder bore.
5. While depressing master cylinder piston, install retainer clip.