
SW1 L4-1.9L SOHC VIN 8 (1996)
1.
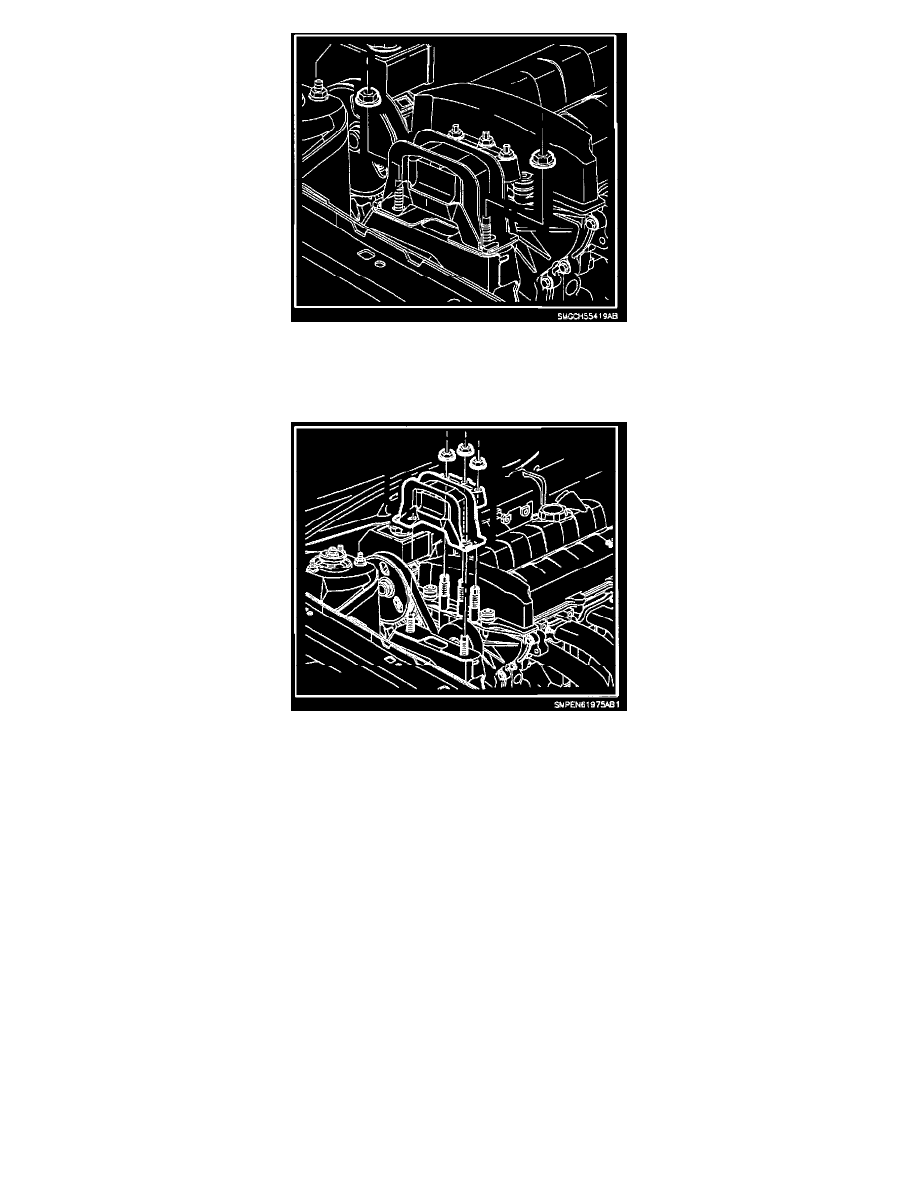
Remove two engine mount-to-midrail bracket nuts and discard.
2.
Place a floor jack under engine oil pan (use a block of wood between oil pan and jack). Raise powertrain just enough to unload engine mount
assembly. (Engine is raised enough when there is clearance between engine mount assembly and midrail bracket.)
3.
Remove three engine mount-to-front cover nuts and discard.
4.
Remove engine mount.
IMPORTANT:
If vehicle has first design mount, front cover studs can be reused with new mount. If vehicle has second design mount, new longer front cover studs
are required with new mount.
5.
If vehicle has second design mount, remove three engine mount front cover studs and discard.
NOTICE:
If any studs turn or come out during nut removal, the stud must be fully installed prior to installing mount and/or nut. Damage to front cover may
occur if the stud is driven with the nut and does not sufficiently engage front cover threads.
6.
Proceed to one of the following sections in this bulletin, as appropriate:
^
If vehicle is equipped with first design mount and no studs turned or came out during removal, proceed to "Engine Mount Assembly
Installation Procedure."
^
If vehicle is equipped with first design mount and studs turned loose during removal, proceed to "Front Cover Stud Installation Procedure."
^
If vehicle is equipped with second design mount, proceed to "Front Cover Stud Installation Procedure."
Front Cover Stud Installation Procedure
NOTICE: