
SW1 L4-1.9L SOHC VIN 8 (1996)
Oxygen Sensor: Service and Repair
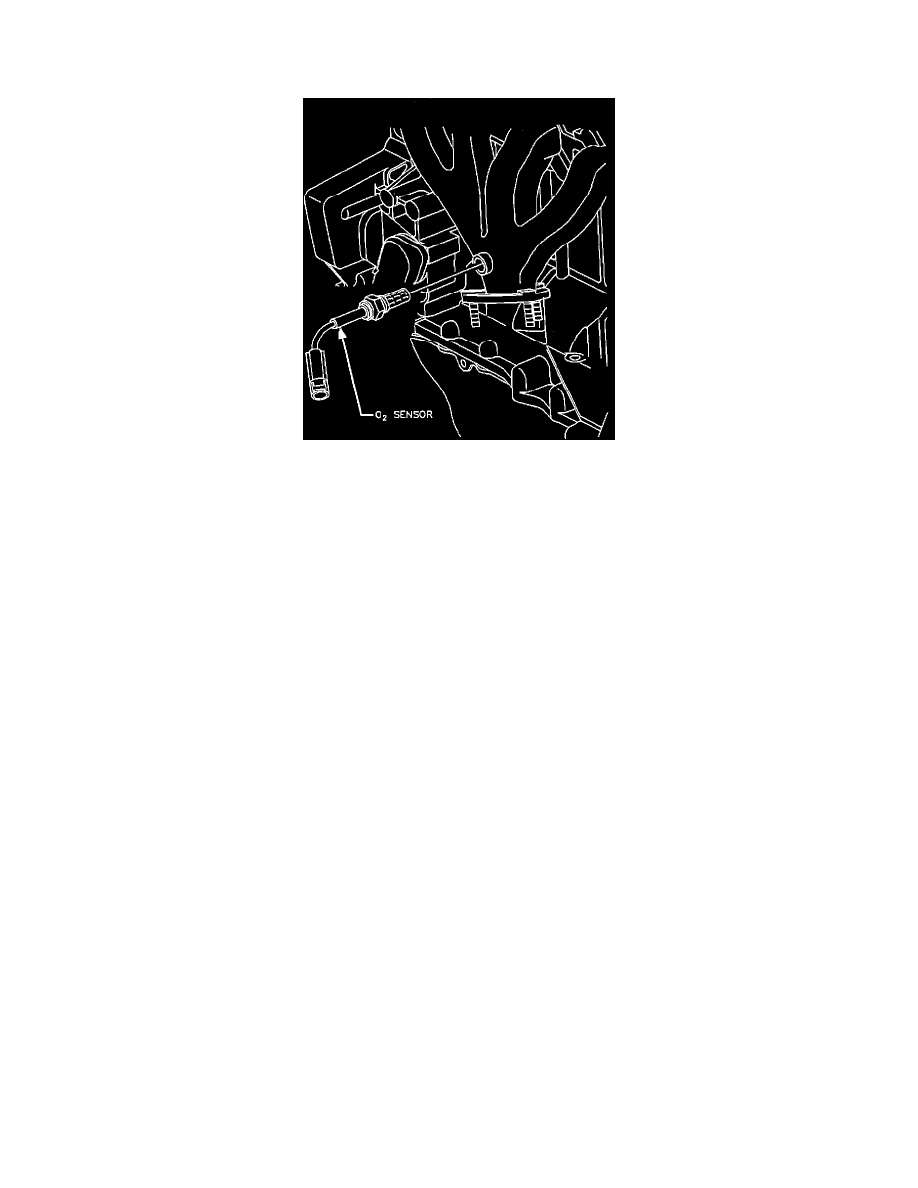
Front Oxygen Sensor
Oxygen Sensor Location.
NOTE: The oxygen sensor uses a permanently attached pigtail and connector. This pigtail should not be removed from the oxygen sensor. Damage or
removal of the pigtail or connector could affect proper operation of the oxygen sensor
REMOVAL
1. Turn ignition Off.
2. Disconnect electrical connector at the oxygen sensor.
3. Use a liquid penetrate before removing sensor.
4. Remove oxygen sensor.
NOTE: Removal of the sensor is easier if the exhaust system is warmed up slightly. Be careful that it is not too hot to work on safely. Various
types of penetrating oils applied to the threads while moving the sensor back and forth will also aid in removal.
CAUTION: DO NOT ALLOW PENETRATING OILS TO CONTACT THE UPPER (AIR REFERENCE) PORTION OF THE
SENSOR. THIS IS THE AREA BETWEEN THE HEX AND LEAD WIRES.
INSTALLATION
1. Apply nickel based anti-seize compound Saturn P/N 21485279 (or equivalent) to the threads of the oxygen sensor.
NOTE: Silicone products will damage oxygen sensor. Use only nickel based anti-seize compound that does not contain silicone.
2. Install oxygen sensor in exhaust manifold.
- Torque: 45 N.m (33 ft-lbs)
3. Connect the electrical connector at the oxygen sensor. Push until a click is heard.
4. Install the connector position assurance device (CPA) in the electrical connector.
NOTE: Take care when handling the oxygen sensor, it should not be dropped or roughly handled. The attached pigtail and connector and the
louvered end must be kept free of dirt, grease or other contaminants. Avoid using cleaning solvents of any type.