
SW1 L4-1.9L SOHC VIN 8 (1996)
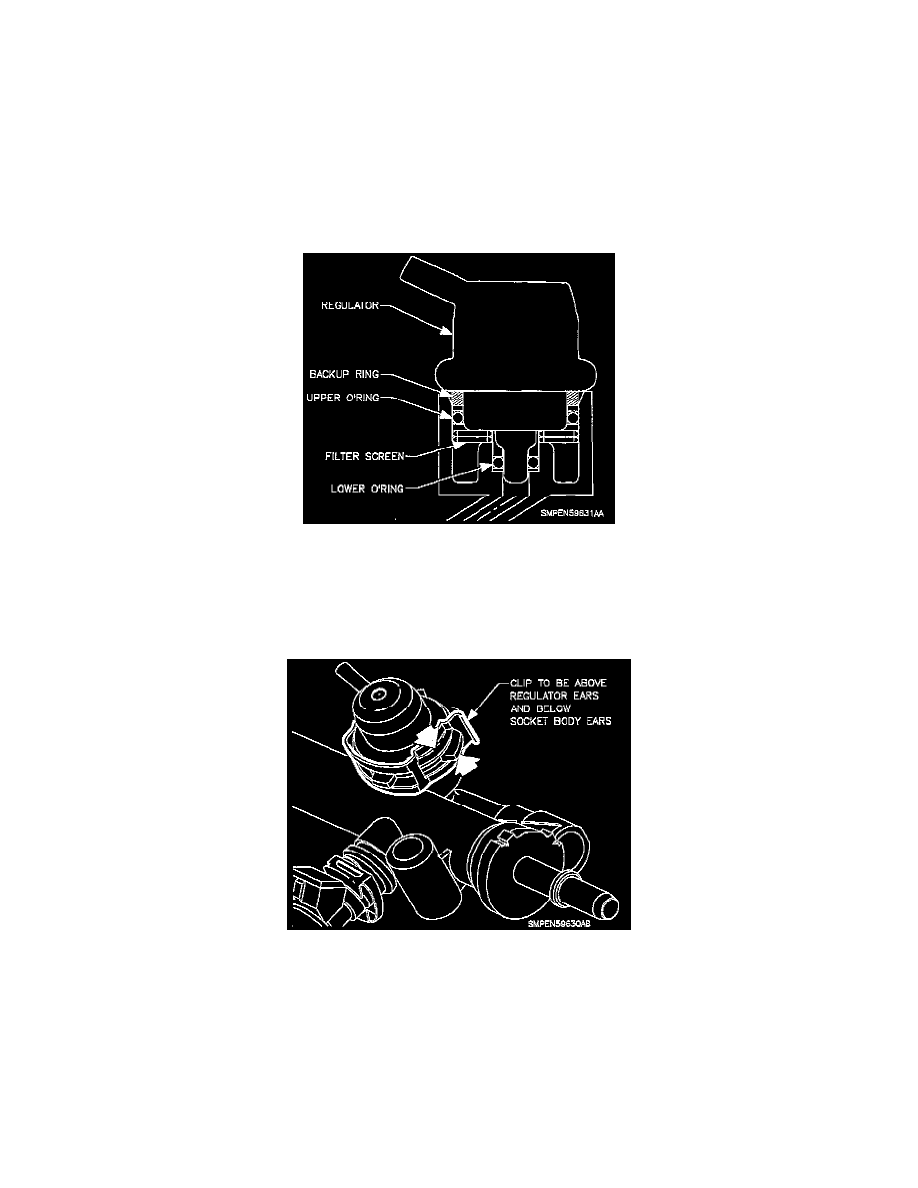
Fuel Pressure Regulator Components
1. When the fuel pressure regulator is disassembled the following components must be replaced with new parts:
-
Back-up ring
-
Upper 0-ring (large 0-ring)
-
Filter screen
-
Lower 0-ring (small 0-ring)
2. Lubricate the upper and lower 0-rings with clean engine oil prior to assembling the fuel pressure regulator.
NOTE: Assemble the back-up ring, upper 0-ring, filter screen and lower 0-ring to the regulator. Next, install the regulator assembly to the fuel rail
socket. This procedure will prevent dropping the lower 0-ring into the fuel rail.
Fuel Pressure Regulator Assembly
3. Assemble the fuel pressure regulator as shown.
4. Using hand pressure only, install the fuel pressure regulator assembly into the fuel rail socket. Rotating the fuel regulator one quarter turn while
installing will assist in the assembly process.
5. Install the new snap ring.
Installing Fuel Pressure Regulator Retainer
NOTE: Ensure that the snap ring is installed correctly the lower side of the clip surrounds the socket (downside) and the small side of the clip (top
side) surrounds the fuel pressure regulator. Ensure the snap ring is fully engaged over the socket tabs and the fuel pressure regulator body.
(Reference illustration.)