
SW1 L4-1.9L SOHC VIN 8 (1996)
PROCEDURE
1.
Install new spark plugs (P/N 21024004 [AC 41-617]- L24, P/N 21024005
[AC 41-618]- LL0). Make sure to check and if necessary, adjust gap to 1.0 mm (0.040 inches).
NOTICE:
Do not reduce the air gap on the original spark plugs (P/N 21021526 - L24, P/N 21021527 - LL0) from 1.5 mm (0.060 inches) to 1.0 mm (0.040
inches), because life expectancy of the spark plugs may be reduced and cold driveability issues may result. New spark plugs (P/N 21024004 - L24,
P/N 21024005 - LL0) must be used with the air gap set to 1.0 mm (0.040 inches).
2.
If vehicles does not have DTCs P0300, P0301, P0302, P0303 and/or P0304 in PCM memory, and there is no exhaust valves sticking (popping
noise heard through exhaust), proceed to step 7.
If vehicle has DTCs P0300, P0301, P0302, P0303 and/or P0304 in PCM memory, and has cylinder head exhaust valves sticking (popping noise
heard through exhaust), proceed to the next step.
3.
Add one bottle of Saturn Fuel Injector Cleaner (P/N 21007313) or equivalent to a full tank of fuel.
IMPORTANT:
Fuel injector cleaner must be added to a full tank of fuel to prevent over treatment of fuel. Adding fuel injector cleaner to a partially filled tank of
fuel may cause the fuel to create deposit formations on the cylinder head valves and in the combustion chambers.
4.
Start engine and bring up to normal operating temperature.
5.
Drive vehicle in D2 (automatic transaxle) or 3rd gear (manual transaxle) for 10 minutes at 80 km/h (50 mph) to clean cylinder head exhaust
valves.
6.
Clear diagnostic trouble codes from PCM memory.
NOTICE:
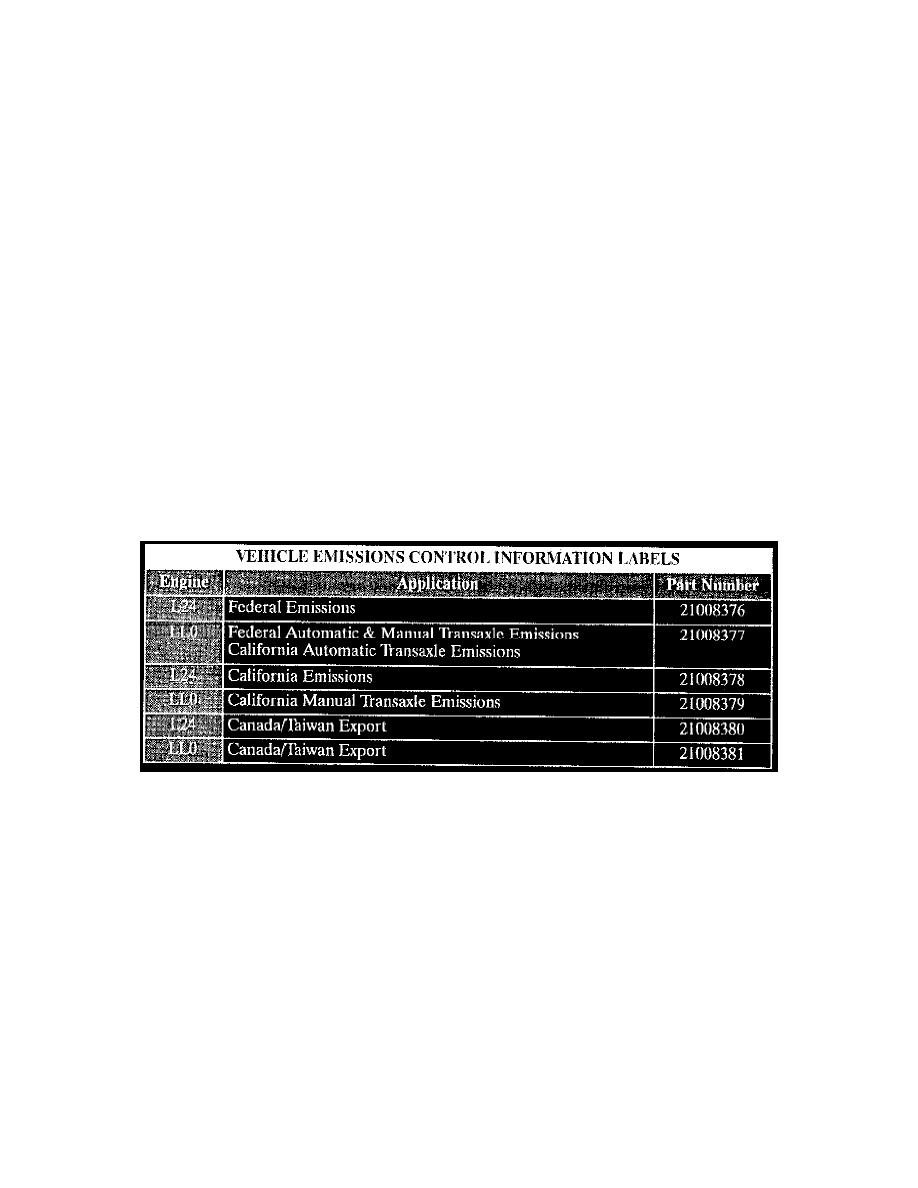
After new spark plugs are installed, a new vehicle emissions control information label must be applied over existing emissions control information
label.
7.
Apply new vehicle emissions control information label ("Saturn Power Module") over the existing vehicle emissions control information label.
a.
Use a clean dry cloth to wipe dirt, oil, etc., from the vehicle emissions control information label currently on the vehicle.
b.
Remove backing from the new vehicle emissions control information label.
c.
Apply the new vehicle emissions control information label over the existing vehicle emissions control information label.
d.
Using a dean dry cloth, smooth the label by starting at the center of the label and working outward on both sides. (Air bubbles can be
removed by puncturing the air bubble with a pin and then smoothing the air bubble over with the clean dry cloth.)
IMPORTANT:
Do not attempt to remove or loosen the new vehicle emissions control information label once it has been installed, or this will damage the new
vehicle emissions control information label.
PARTS REQUIREMENTS: