
SW1 L4-1.9L SOHC VIN 8 (1996)
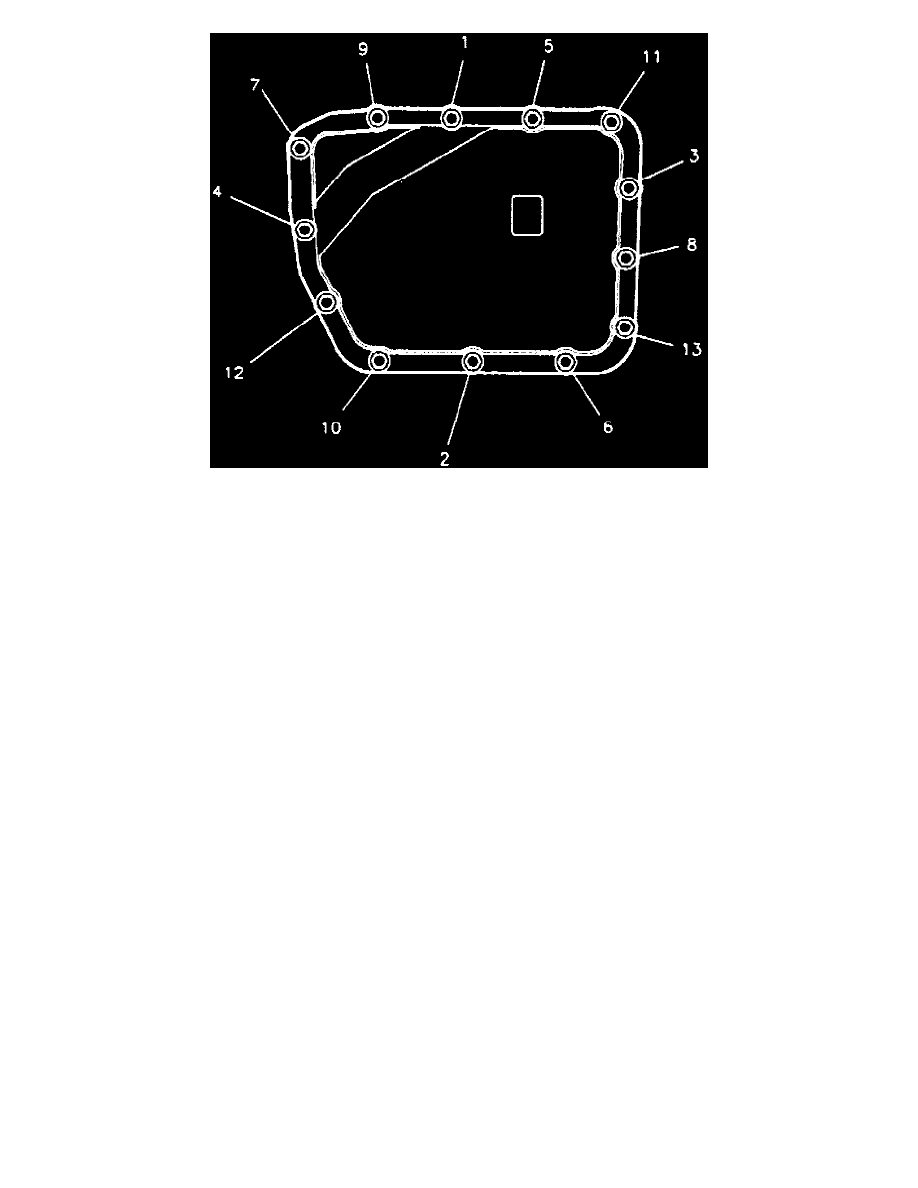
Fig. 9 Valve Body Cover Bolt Tightening Sequence
INSTALLATION
1. Install manual valve to manual link with manual valve flat facing upwards.
2. Lower valve body, then install manual link to manual valve.
3. Valve body to case attaching bolts must be placed in the valve body prior to installation, Fig. 6.
4. Clean and lubricate attaching bolts with Dexron II or equivalent.
5. Tighten valve body bolts in sequence, Fig. 7. , to specifications.
6. Tighten valve body to case attaching bolts in sequence, Fig. 8. , to specifications.
7. Using suitable carburetor cleaner, clean valve body cover gasket surface, then install valve body cover attaching bolts, in sequence, Fig. 9. , and
tighten to Specifications. See: Specifications
8. On models equipped with ABS, install master cylinder to booster attaching nuts, then tighten to specifications.
9. Connector transaxle electrical connector, then tighten connector attaching bolt to specifications.
10. Install battery tray, then tighten attaching bolts to specifications.
11. Install battery and battery shield attaching bolts, then tighten to specifications.
12. Connect battery terminals. Connect positive terminal first to prevent arcing.