SW1 L4-1.9L SOHC VIN 8 (1996)

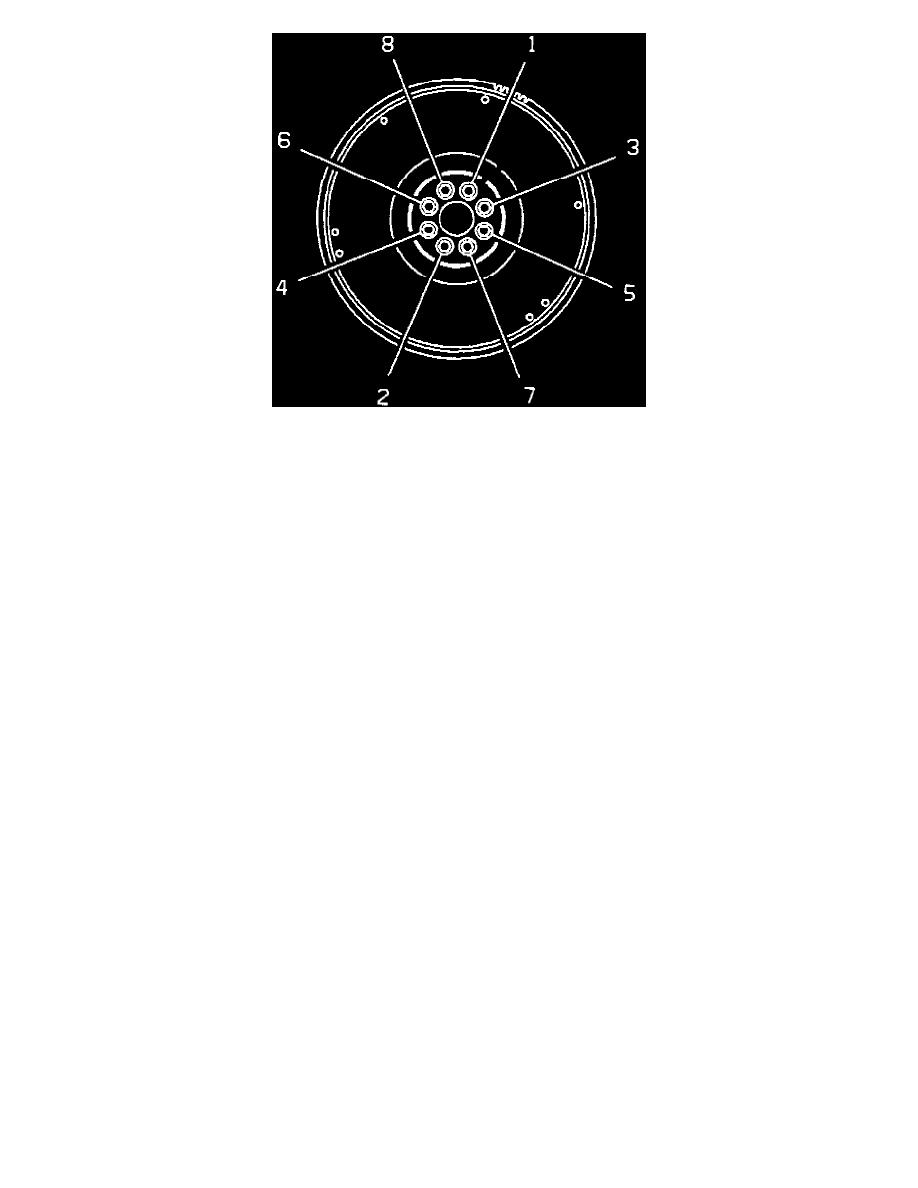
Fig. 4 Flywheel Tightening Sequence
REMOVAL
1. Remove transaxle. Refer to Transmission and Drivetrain/Manual Transmission/Transaxle. See: Manual Transmission/Transaxle/Service and
Repair
2. Remove unsnap release fork and bearing from ball stud to remove.
3. Slide release bearing from release fork, then check release bearing for excessive play or minimal drag, replace as required. Do not wash bearing
in solvent.
4. Using a feeler gauge, measure between pressure plate and flywheel; .205-.287 inch should be indicated. If not, replace clutch disc.
5. Remove pressure plate to flywheel attaching bolts in progressive crisscross pattern.
6. Remove pressure plate and clutch disc.
INSPECTION
1. Inspect pressure plate for excessive wear, chatter marks, cracks or overheating, replace as required. Random black spotting on friction surface
is normal.
2. Using a straightedge and feeler gauge, measure pressure plate warpage, Fig.2. Maximum warpage is .006 inch.
3. Inspect clutch disc for oil, burn marks and loose damper springs, hub or rivets; replace as required.
4. Inspect flywheel ring gear for wear or damage; replace as required.
5. Measure flywheel thickness, Fig. 3. If flywheel is not at least 1.102 inch thick, replace it.
6. Using a dial indicator, measure flywheel runout while pushing crankshaft forward to take up thrust bearing clearance. Maximum runout is .006
inch; replace as required.
7. Remove flywheel to crankshaft attaching bolts, then remove flywheel.
INSTALLATION
1. Install flywheel to crankshaft attaching bolts, then tighten in sequence, Fig. 4. , to specifications.
2. Install clutch disc and pressure plate, with pressure plate yellow dot aligned with flywheel mark, then start pressure plate to flywheel bolts.
3. Insert clutch disc alignment tool No. SA9145T, or equivalent, into center hole until it bottoms out in crankshaft.
4. Tighten pressure plate bolts to specifications in crisscross pattern.
5. Remove clutch alignment tool, then install fork clip.
6. Lubricate fork pivot using high temperature grease part No. 21005995, or equivalent, then install release bearing to fork. Do not lubricate release
bearing or quill.
7. Install release fork and bearing to ball stud.
8. Lubricate input shaft splines, then install transaxle assembly. Refer to Transmission and Drivetrain/Manual Transmission/Transaxle.
See: Manual Transmission/Transaxle/Service and Repair
