
SW2 L4-1.9L DOHC VIN 7 (1997)
Rear Knuckle Alignment Link: Service and Repair
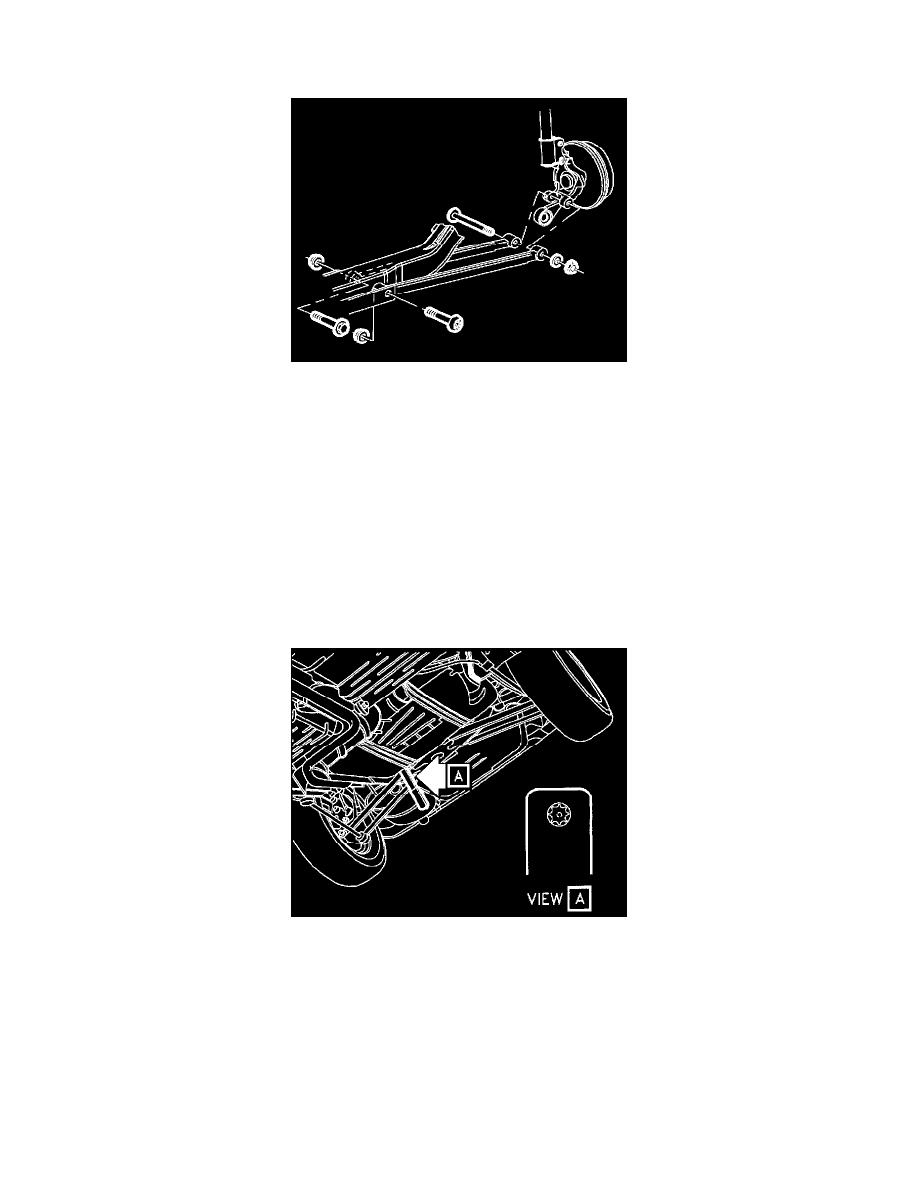
Installation
1. Install lateral link into crossmember and install fastener.
IMPORTANT: If front lateral link is being replaced, remove anti-rotation tab on fastener nut. Tab is not required for service. Do not torque at
this time.
2. Install lateral link into knuckle; install fastener.
IMPORTANT: Do not torque at this time.
3. Install crossmember to vehicle. Align crossmember to body using a 3/8 inch rod at alignment hole and slot.
NOTICE: New bolts of correct size and at correct location must be used.
4. Install four crossmember-to-body fasteners.
-
Torque: 120 Nm (89 Bulbs.)
5. Torque lateral link-to-crossmember fastener. If front lateral link is being replaced, use Front Lateral Link tool (SA 9411C) to prevent TORX(R)
bolt rotation while torqueing fastener.
-
Torque: 120 Nm (89 ft. lbs.)
6. Torque lateral link-to-knuckle fastener.
-
Torque: 165 Nm (122 ft. lbs.)
7. Secure rear brake pipes to underbody with plastic clip and nut at stud.
NOTICE: Before installing wheels, remove rust or corrosion from wheel mounting surfaces and brake rotors/drums. Failure to do so can cause
wheel lug nuts to loosen in service.
8. Position wheel onto hub.
9. Install wheel nuts and tighten in a crisscross pattern. Repeat tightening pattern to make sure torque is correct.