
VUE FWD V6-3.5L (2008)
Notice: Failure to tighten vertical bolts before the diagonal bolts may cause an oil leak.
9. Apply sealer to the lower intake manifold bolt threads. Refer to Adhesives, Fluids, Lubricants, and Sealers (See: Specifications/Adhesives, Fluids,
Lubricants, and Sealers) .
10. Install the lower intake manifold bolts.
11. Tighten the lower intake manifold bolts in the sequence shown.
1. Tighten the bolts (1, 2, 3, 4) in sequence to 16 N.m (12 lb ft).
2. Tighten the bolts (5, 6, 7, 8) in sequence to 25 N.m (18 lb ft).
12. Inspect the fuel rail, fuel injectors and fuel injector O-rings for damage and replace, as necessary.
13. Lubricate the fuel injector O-rings using engine oil. Refer to Adhesives, Fluids, Lubricants, and Sealers (See: Specifications/Adhesives, Fluids,
Lubricants, and Sealers) .
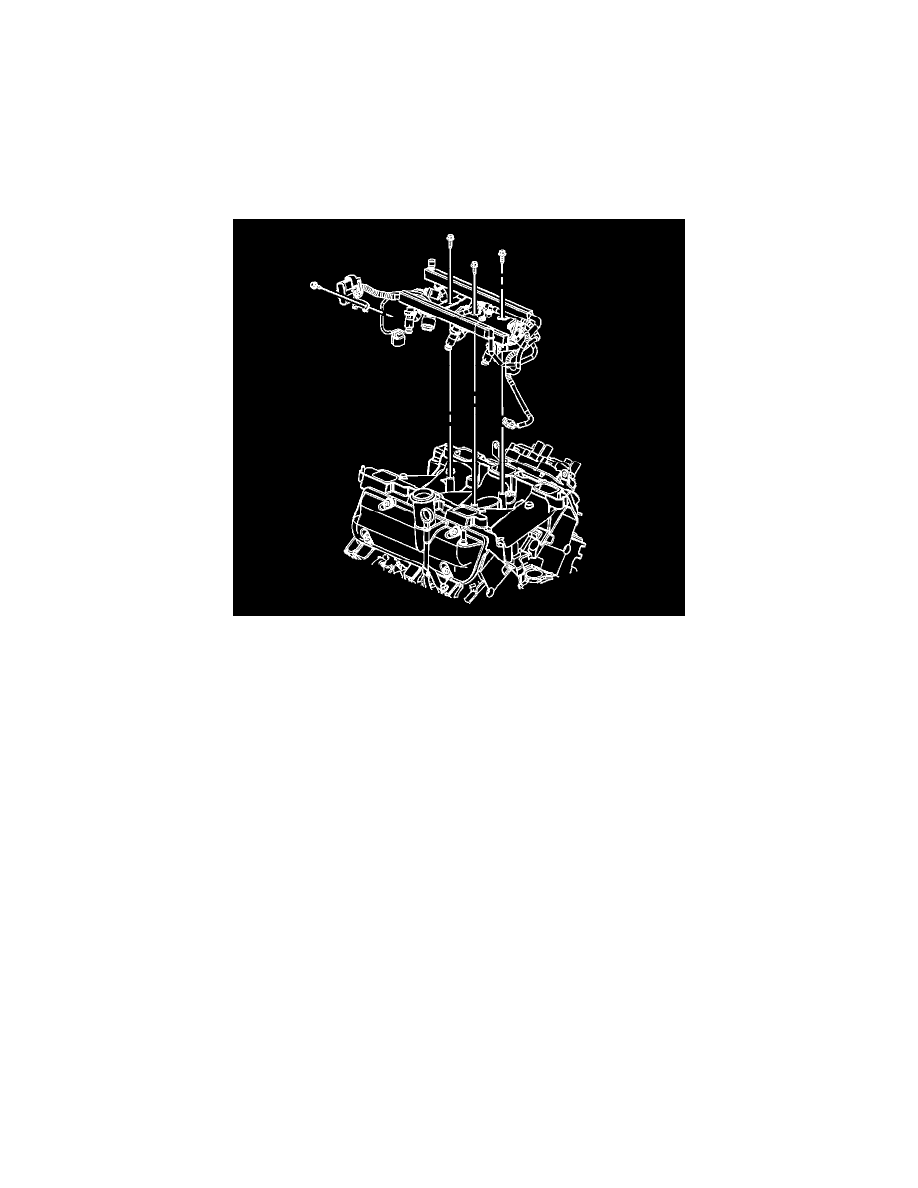
14. Install the injector nozzles into the lower intake manifold injector bores.
15. Press on the injector rail using the palms of both hands until the injector are fully seated.
16. Install the fuel injector rail bolts.
Tighten the bolts to 10 N.m (89 lb in).
17. Connect the CMP sensor electrical connector.
18. Connect the ECT electrical connector.
19. Position the fuel injector harness connector bracket to the intake manifold.
20. Install the fuel injector harness connector bracket bolt.
Tighten the bolt to 8 N.m (71 lb in).