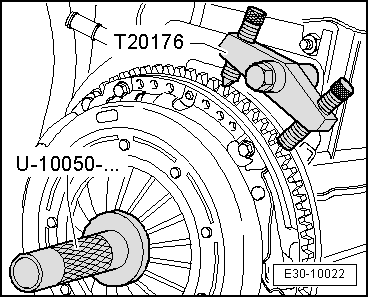
| l
| Installation is carried out in the reverse order, noting the following: |

Note | t
| Replace clutch plate and pressure disk with damaged or loose riveted unions. |
| t
| To reduce the unpleasant smells of a burnt clutch, the clutch bell-housing must be thoroughly cleaned, along with the flywheel and engine at the side facing the clutch. |
| t
| Clean the cogs of the input shaft and, if the clutch plates are worn, the hub cogs; eliminate corrosion and apply a very fine layer of lubricating grease to the cogs → Electronic spare parts catalogue „ETKA“. Then move the clutch plate on the input shaft from side to side, until the hub moves smoothly on the shaft. It is essential to remove excess grease. |
| t
| The pressure disk has anti-corrosion protection and is greased. Only the contact surface must be cleaned; otherwise the working life of the clutch will be considerably reduced. |
| t
| The contact surface of the pressure disk and clutch plate lining must be in total contact with the flywheel. Only then can the securing bolts be inserted. |
| l
| Clutch plate installation position: the spring cage should point towards the pressure plate. |
|
|
|
 Note
Note
 Note
Note