| Emblems rear installation and removal |
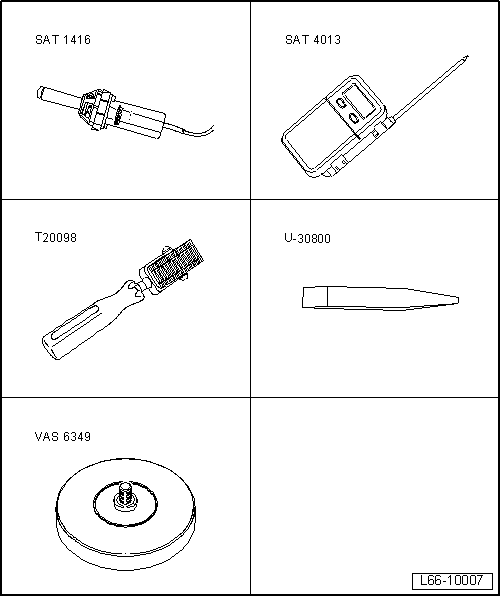
| Special tools and workshop equipment required |
| t
| Hot air blower -SAT 1416- |
| t
| Digital thermometer -SAT 4013- |
| t
| Adhesive strip remover -VAS 6349- |
| –
| Before removing the self-adhesive company emblem on the front wing, heat it up to approx. 25 ℃ with a hot air gun -SAT 1416-. |
| –
| Using the lever -U 30800-, remove the self-adhesive company emblem from the front wing. |
| –
| Remove existing adhesive residue of adhesive tape using adhesive strip remover -VAS 6349-. |

Note | t
| Do not remove the protective film of the self-adhesive emblem until the assembly work on the vehicle has been completed. |
| t
| The lettering must be bonded in place immediately after cleaning. |
| t
| Remove protective foil immediately before installation. |
| –
| Clean the area of the front wing where new self-adhesive company emblem is to be applied with isopropanol or heptanes alcohol. |
| –
| Then treat the area where the new self-adhesive company emblem should be applied using silicone cleaner. |
| –
| Using the hot air blower -SAT 1416-, heat the application area on the bodywork to approx. 35°C. Check the temperature using the digital thermometer -SAT 4013-. |
| Continuation only for emblem „SEAT“ |
|
|
|