
Leon Mk1
| Adhesive logos on the IBIZA 5P tailgate: removal and installation |
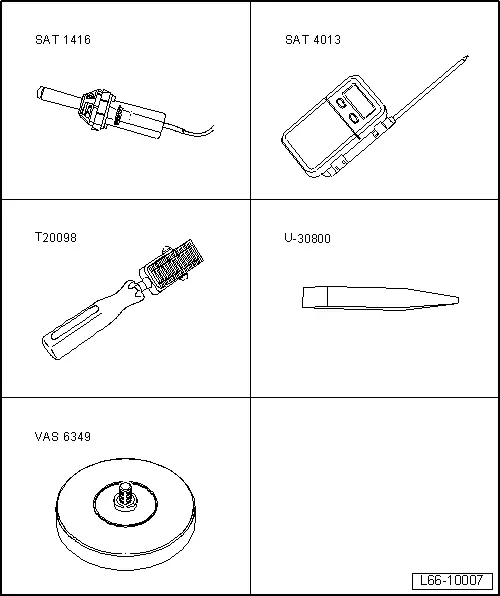
| Special tools and workshop equipment required |
| t | Hot air blower -SAT 1416- |
| t | Digital thermometer -SAT 4013- |
| t | Thrust piece -T20098- |
| t | Lever -U 30800- |
| t | Adhesive strip remover -VAS 6349- |
|
| Continue only for the IBIZA sticker |

| – | Remove the backing paper -2- from the gluing strip for the new „IBIZA“ sticker. |
| – | Apply the „IBIZA“ sticker at a distance of 60 mm as shown in the figure. |
| – | Attach sticker -3- and press down with pressure tool -T20098- with force of approx 5 kg. |
| – | Remove backing paper -1- from „IBIZA“ stickers. |
| Continue only for FR sticker |

| – | Remove the backing paper -2- from the gluing strip for the new „FR“ sticker. |
| – | Apply the „FR“ sticker at a distance of 52.5 mm as shown in the figure. |
| – | Attach sticker -1- and press down with pressure tool -T20098- with force of approx 5 kg. |
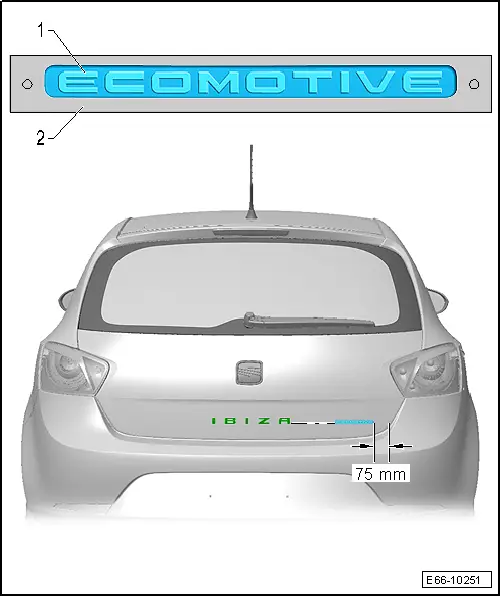
| Continue only for the BI FUEL sticker |

| – | Remove the backing paper -2- from the gluing strip for the new „BI FUEL“ sticker. |
| – | Apply the „BI FUEL“ sticker at a distance of 75 mm as shown in the figure. |
| – | Attach sticker -1- and press down with pressure tool -T20098- with force of approx 5 kg. |
| Continue only for the ECOMOTIVE sticker |
| – | Remove the backing foil -2- from the adhesive strip for the new „ECOMOTIVE“ logo stickers. |
| – | Apply the „ECOMOTIVE“ sticker at a distance of 75 mm as shown in the figure. |
| – | Attach sticker -1- and press down with pressure tool -T20098- with force of approx 5 kg. |
| Continue only for the E ECOMOTIVE sticker |
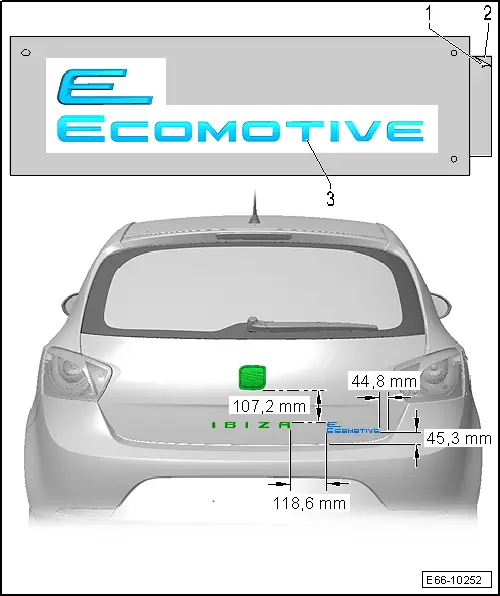
| – | Remove the backing foil -2- from the adhesive strip for the new „E ECOMOTIVE“ logo stickers. |
| – | Apply the „E ECOMOTIVE“ sticker at the distance shown in the figure. |
| – | Attach sticker -3- and press down with pressure tool -T20098- with force of approx 5 kg. |
| – | Remove backing paper -1- from „E ECOMOTIVE“ stickers. |