
Leon Mk1
|
|
|
 Note
Note
|
|
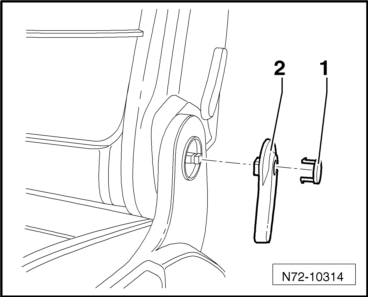
| – | Detach trim -1- from mounting -2- in rear area of backrest adjustment. |
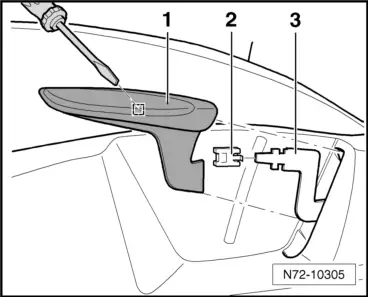
| – | Detach trim -1- from mounting -3- in front area of backrest adjustment. |

| – | Undo the screw -1- (2 Nm). |
| – | Press clamping pin -2- inwards out of spreader clip -3-. |
| – | Remove spreader clip. |
| – | Detach trim -4- from mountings in seat frame and remove in direction of travel. |

|