seat Workshop Repair Guides

SEAT Workshop Service and Repair Manuals

Dismantling and assembling pistons and conrods > < Dismantling and assembling engine
4-cyl. injection engine (2 valve without intermediate shaft), Mechanics
Dismantling and assembling engine
Removing and installing ribbed belt
 
W00-1040

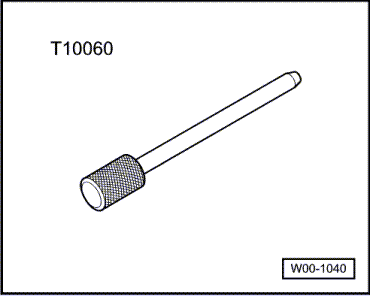
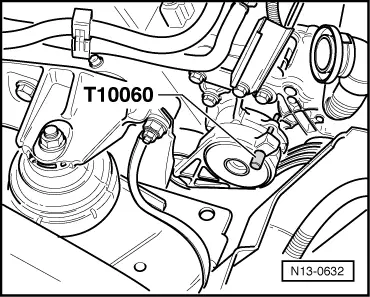
Special tools, workshop equipment, testers, measuring instruments and auxiliary items required

  • ◆ Retaining pin T10060
  • ◆ Spanner 15 mm AF

Work sequence

  • ‒ Remove air cleaner:

=> Repair group 24; Servicing injection system; Dismantling and assembling air cleaner.

  • ‒ Mark direction of rotation of ribbed belt.
 
A13-0083
  • ‒ → To slacken ribbed belt turn tensioning element with a 16 mm spanner in direction of arrow.
 
N13-0632
  • ‒ → Lock tensioning element with retaining pin T10060.
  • ‒ Remove noise insulation tray:
  • ‒ Remove ribbed belt.

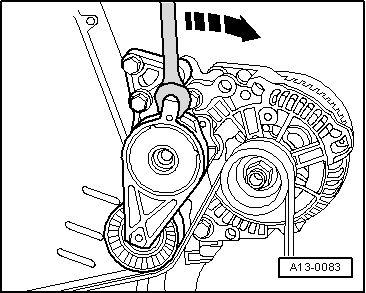
Installing ribbed belt

  • ‒ Install in reverse order.

Notes:

  • ◆ Ensure, before installing ribbed belt, that all ancillaries (alternator, air conditioner compressor, power assisted steering vane pump) are secured tightly.
  • ◆ When fitting the ribbed belt observe belt direction of rotation and that the belt is seated correctly in the belt pulleys.
  • ◆ For vehicles without air conditioning, put ribbed belt over alternator last.
  • ◆ For vehicles with air conditioning, put ribbed belt over air conditioning compressor last.

After completing repairs always:

  • ‒ Start engine and check belt running.
 
A13-0097

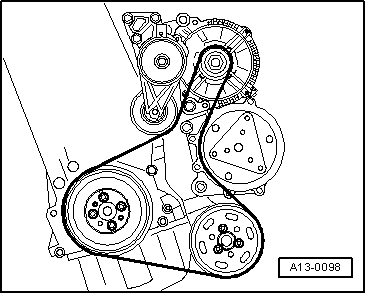
→ Belt drive without air conditioner compressor

 
A13-0098

→ Belt drive with air conditioner compressor

Note:

Engines with an air conditioner compressor are fitted with a double ribbed belt.

Dismantling and assembling pistons and conrods > < Dismantling and assembling engine