Note | To carry out this work it will be necessary to disconnect battery earth strap. Therefore check whether a coded radio is fitted. Where necessary, check the anti-theft coding first. |
| –
| The engine is removed upwards together with the gearbox. |
| –
| All the cable fixings that are opened or cut during removal of the cylinder head must be fitted in the same position when reinstalling the engine. |

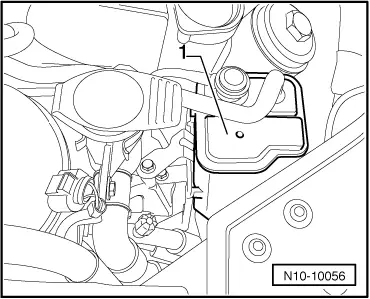
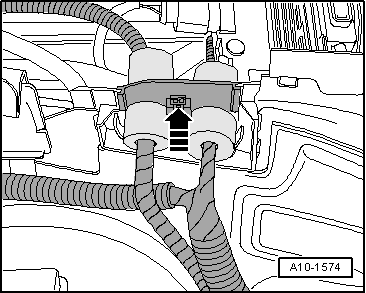
WARNING | Steam may be released when opening the expansion tank. Wear safety goggles and appropriate clothing to avoid injury to eyes and burns. Cover the cap with a cloth and open carefully. |
|
| –
| Open and close the compensation tank cap to release pressure in cooling system. |
| –
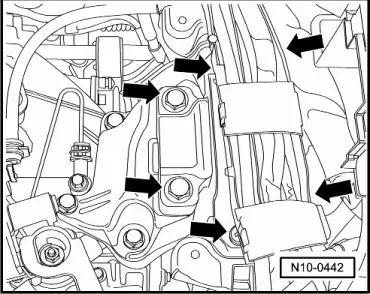
| Remove all of the electrical cables from the gearbox, alternator, and starter motor leaving them uncovered. |
| –
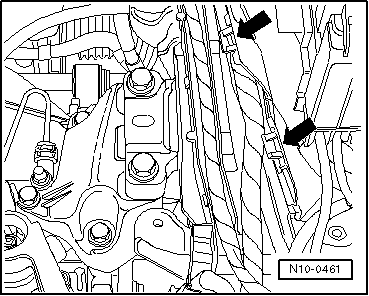
| Disconnect all other electrical connections as necessary from engine and lay to one side. |
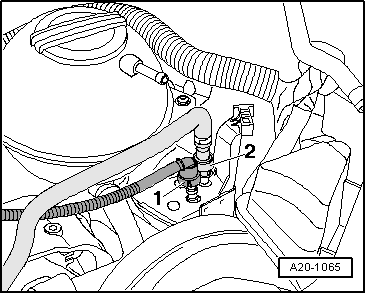
WARNING | Fuel supply pipes are pressurised. Wear safety goggles and appropriate clothing to avoid injury and contact with skin. Before loosening hose connections, wrap a cloth around the connection. Then eliminate the pressure by carefully separating the pipe. |
|
|
|
|

 Caution