seat Workshop Repair Guides

SEAT Workshop Service and Repair Manuals

Rear wheel disc brake: repairing > < Removing and installing control unit for electromechanical parking brakeJ540
Removing and installing parking brake motor
Special tools and workshop equipment required
   
t  Torque wrench -V.A.G 1331-
t  Vehicle diagnostic, testing and information system -VAS 5051-
  W00-0427
t  Diagnosis cable -VAS 5051/1- or -VAS 5051/3-
Removal:
  Note
Switch off ignition for at least 30 seconds before disconnecting connector.
  W00-1236
–  Detach connector -1- from parking brake motor.
  N46-10163
–  Undo and remove both Torx bolts -arrows- of parking brake motor.
–  Remove parking brake motor from brake caliper.
–  Take out seal.
Take care not to damage annular groove for seal and contact surface on parking brake motor.
–  Clean annular groove and contact surface on parking brake motor.
Installation
  N46-10165
–  Slightly moisten new sealing ring with brake fluid, then fit.
  N46-10166
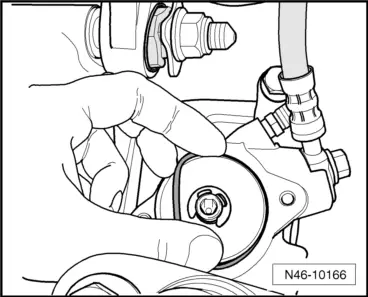
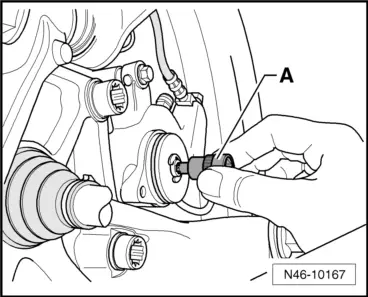
–  Turn spindle back slightly, using an 8 mm multi-point socket bit -A-, until parking brake motor can be inserted correctly.
  Caution
The sealing ring must not be allowed to turn out while the parking brake motor is being installed!
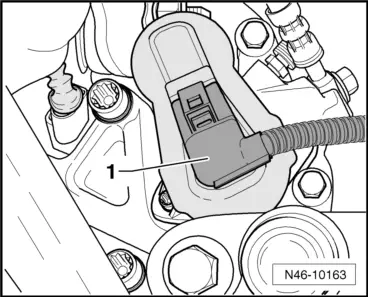
–  Carefully put the parking brake motor in place, while ensuring that the sealing ring is correctly seated.
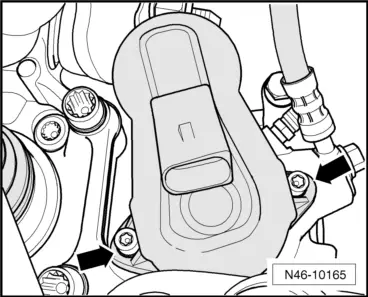
–  Turn parking brake motor until bolt hole and thread align.
Make sure that parking brake motor is flush with brake caliper. Never pull parking brake motor onto brake caliper using securing bolts.
  N46-10167
–  Position the two Torx bolts -arrows- by hand and then tighten.
–  Fit the connector.
–  Perform basic setting of brake system.
–  Connecting → Vehicle diagnostic, testing and information system VAS 5051 and selecting functions → Chapter.
  N46-10165

Rear wheel disc brake: repairing > < Removing and installing control unit for electromechanical parking brakeJ540