seat Workshop Repair Guides

SEAT Workshop Service and Repair Manuals

Front wheel suspension: repairing > < Assembly
Fitting the tripod
Fitting the tripod
The bevel -arrow- on the tripod should face the half shaft and it helps the fitting process.
   
–  Insert the tripod onto the half-shaft according to the marks that were made previously and insert it to the limit.
–  Fit the securing ring and ensure that it is correctly seated.
–  Insert the rollers in the tripod according to the marks.
–  Move the joint casing onto the rollers and secure it.
–  Remove the complete half shaft from the bench vice and attach it to the joint casing.
  E40-0188
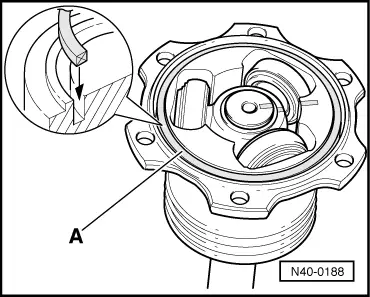
–  Insert the square shaped joining ring -arrow- from the repair kit.
Due to the square shape of the join ring, a direct seal is achieved between the tripod joint and the join flange.
  Note
Thus there is no need for a cover!
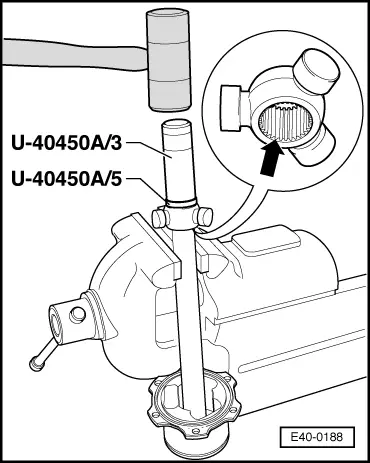
–  Introduce 60 grams of grease for complete half shafts, from the repair kit, on the rear side of the tripod joint.
–  Fit the dust guard to the joint.
–  Fit the spring clip.
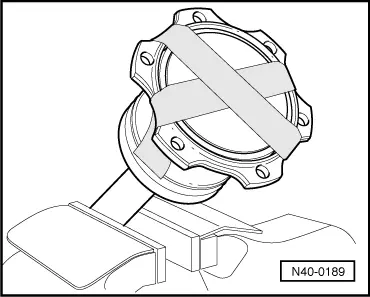
–  Tense the small strip clamp.
  Note
Apply caution for installation!
  N40-0188
–  Secure the tripod joint using adhesive tape so that it does not slip back when fitting the complete half shaft.
–  The adhesive tape will not be removed until the joint is tightened to the joining bracket.
  N40-0189

Front wheel suspension: repairing > < Assembly