seat Workshop Repair Guides

SEAT Workshop Service and Repair Manuals

Trapezium link > < Drive shaft: Assembly overview
Removing and installing lower transverse link
Special tools and workshop equipment required
   
t  Torque wrench -V.A.G 1332-
Carry out the following work:
removing
–  Loosen wheel bolts.
–  Raise the vehicle.
–  Remove wheel.
–  Remove coil spring → Chapter.
  W00-0428
–  Unscrew bolt -arrow- for lower transverse link -1-.
  N42-10157
Vehicles with dynamic headlight range control
–  Remove bolts -1- from lower transverse link.
Continued for all vehicles
–  Mark position of eccentric bolt -arrow- in relation to subframe, for example using a felt-tip pen.
–  Remove bolt -arrow-.
–  Take out lower transverse link.
Installation
–  Insert lower transverse link into vehicle and hand-tighten bolts.
Transverse link may be bolted only when dimension „a“ has been attained → Fig..
  N42-10520
–  Tighten new nut -arrow- to specified torque only.
–  Observe mark made for position of eccentric bolt -arrow- relative to subframe.
Vehicles with dynamic headlight range control
–  Install bolts -1- in lower transverse link.
Continued for all vehicles
  N42-10520
–  Tighten bolt -arrow- for lower transverse link -1-.
–  Install coil spring → Anchor.
–  Fit and secure wheel.
–  Perform wheel alignment.
  N42-10157
Specified torques
ComponentTightening torque
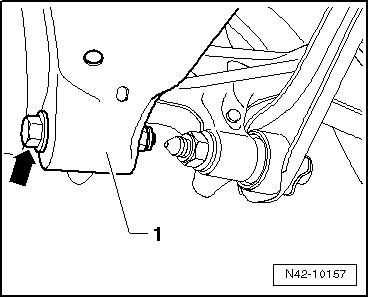
Lower transverse link to wheel bearing housing
t  Use new nuts and bolts
t  Tighten threaded connections only when vehicle is in the normal running position
90 Nm + 90°
Lower transverse link to subframe
t  Use new nuts
t  Tighten threaded connections only when vehicle is in the normal running position
95 Nm
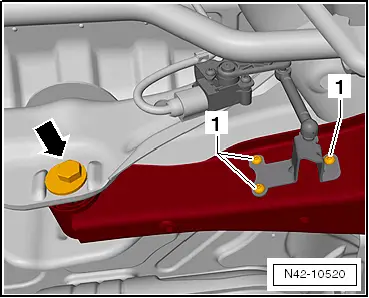
Rear left vehicle level sender -G76- to lower transverse link5 Nm


Trapezium link > < Drive shaft: Assembly overview