seat Workshop Repair Guides

SEAT Workshop Service and Repair Manuals

Tightening torques: Lights, lamps and exterior switches > < Control unit bracket: removing and installing
Actuator for structure-borne soundR214: removing and installing
Actuator for structure-borne sound -R214-: removing and installing
Is located in the centre area of the plenum chamber.
Removing:
–  Switch off ignition and all electrical consumers and remove ignition key.
–  Remove the air grille below the windscreen → Chapter.
–  Unscrew the fastening clips -1- of the sound insulation of the plenum chamber -2-.
   
–  Separate the sound insulation -2- from the plenum chamber cover -arrow-.
–  Remove the fixing screws -3- of the plenum chamber cover.
  E94-10302
–  Remove the plenum chamber cover in the direction of the -arrow- and insert a wedge or spacer -1- so that the plenum chamber cover remains separated.
–  Undo the fixing screws -2- from the bracket of the actuator for structure-borne sound -R214-.
–  Remove the actuator for structure-borne sound -R214- unit and bracket from the right side of the plenum chamber.
  E94-10303
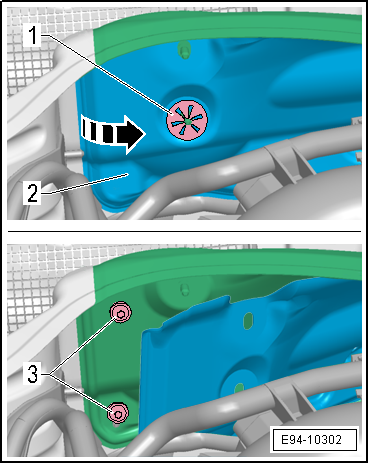
–  Disconnect the connector -1- on the actuator for structure-borne sound -R214-.
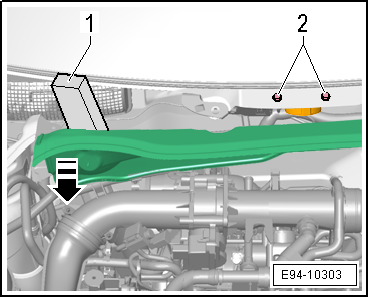
–  Remove bolt-2-. They connect the actuator for structure-borne sound -R214- with the bracket.
Installing:
–  For fitting, the operations are carried out in reverse order to the removal, taking the following into account:
  Note
t  
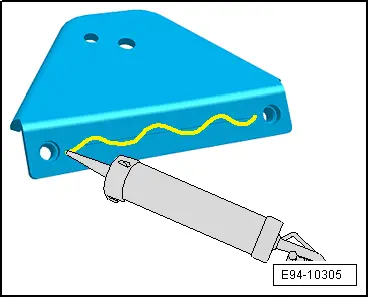
The contact surface of the bracket on the body must be cleaned and an adhesive cord must be applied to the line.
  E94-10304
t  Adhesive to be applied AMV 167 151 (2 g) → Spare parts catalogue.
t  The tightening torque of the nuts for connecting the actuator for structure-borne sound -R214- with the bracket is 5 Nm.
t  The tightening torque of both screws for fixing the bracket of the actuator for structure-borne sound -R214- to the body is 5 Nm.
  E94-10305

Tightening torques: Lights, lamps and exterior switches > < Control unit bracket: removing and installing