Steering column combined switch: removal and installation
Dismount of the steering column combined switch
Dismount of the steering column combined switch
Caution
Before working on the electric system you must disconnect the battery grounding strap.
Note!
t
Before disconnecting the battery check anti-theft coding on radios that have this feature
t
If the battery is reconnected check the vehicle equipment (radio, clock, power windows), following the indications in the Workshop Manual and/or the Operating Instructions
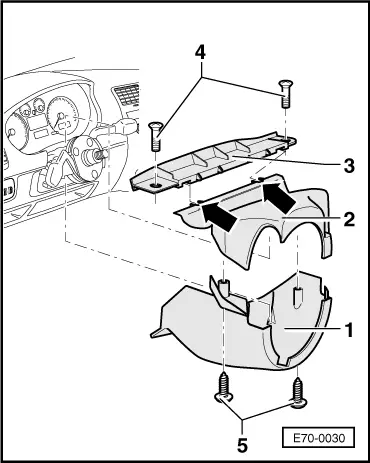
Dismount the screws -5- and remove the lower casing of the combined commutator from the steering column -1-.
–
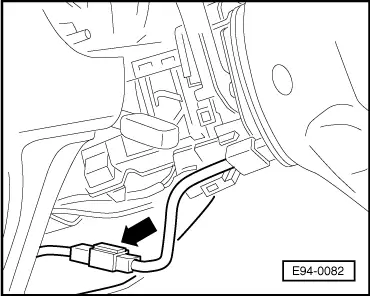
Uncouple the connector -arrow- from the reverse unit.
–
Uncouple the connector from the body of the steering lock.
–
Unscrew the hexagonal nut and remove the steering wheel from the column.
–
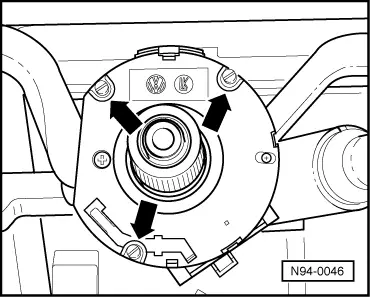
Unscrew the star-screws -arrows-.
–
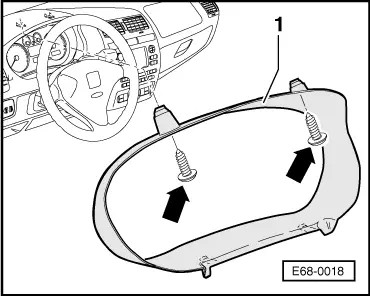
Remove the embelisher -1- for the instrument panel. For this, unhook the locking clips situated on the lower part of the embellisher.
–
Dismount the screws -4- and remove the regulator -3- together with the upper casing of the combined commutator of the steering column -2-.
Note!
Before remounting, separate the regulator -3- and the upper casing of the steering column commutator by unhooking the locking hooks and then mount one piece after the other.
–
Unscrew the securing bolts -arrows-.
–
Separate the connectors towards the intermitent and windscreen wiper commutators.
–
Remove fromthe steering column the commutator levers of the intermitents and the windscreen wipers.
 Caution
 Note!
Note!