seat Workshop Repair Guides

SEAT Workshop Service and Repair Manuals

Starter motor: > < Repairing wiring harnesses and connectors
Removing and installing the alternator
  Caution
To disconnect and reconnect the battery, the procedure described in the workshop manual should be strictly adhered to → Chapter.
Special tools and workshop equipment required
   
t  Torque wrench -V.A.G 1331-
Removing:
–  Disconnect battery . → Chapter
–  Move lock carrier to service position → General body repairs, exterior; Rep. gr.50.
–  Remove poly V-belts → Rep. gr.13.
  W00-0427
–  Undo and remove the 2 securing bolts -arrows- securing the alternator.
–  Remove alternator -1- and turn it over, taking into account the lengths of attached wires.
  N27-11022
–  Release and pull off DF cable connector -4-.
–  Undo nut -3- and detach B+ wire -2- from connection thread.
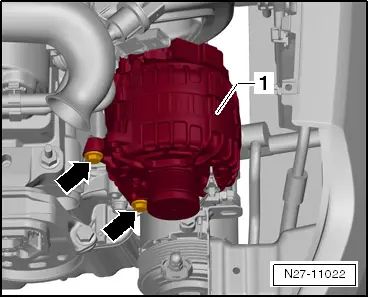
–  Remove alternator -1- upwards out of the vehicle.
Installing:
Install in the same way but in reverse order of removal. When doing this, note the following:
  Caution
t  When fitting used poly V-belts, take note of the direction of rotation as marked during removal!
t  
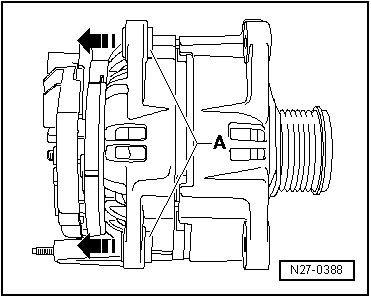
Before installing poly V-belt, ensure that all ancillaries (alternator, air conditioner compressor) are secure.
t  When fitting belt, ensure that poly V-belt seats correctly in pulleys!
  N27-11023
–  Drive threaded sleeves -A- about 4 mm in direction of arrow out of alternator housing.
–  Tighten threaded connections to torque specified in assembly overview → Chapter.
–  Connecting battery → Chapter.
–  Start engine and check belt running.
  N27-0388

Starter motor: > < Repairing wiring harnesses and connectors