seat Workshop Repair Guides

SEAT Workshop Service and Repair Manuals

Gearbox?: removing and fitting > < Remove and install metal transfer lever
Plastic idler rod: removing and fitting
  WARNING
t  Before removing the idler rod, leave the gearbox mechanism in neutral, so that the rod is free.
t  To remove it, separate the selector cable fastener so that the cable is not damaged.
Detach the fastening element from the connection cable
   
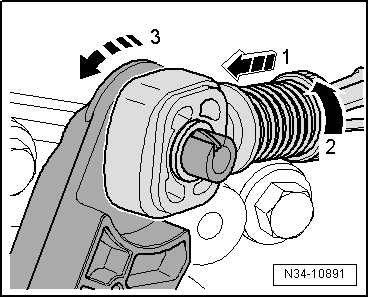
–  Pull the safety mechanism forwards, as far as possible towards -arrow 1-, then block it by turning it to the right, in the direction of -arrow 2-.
–  Then press the idler rod forwards, towards -arrow 3-.
Remove plastic transfer lever
  WARNING
The idler rod should be removed slowly, moving it back and forth to avoid breaking the housing.
  N34-10891
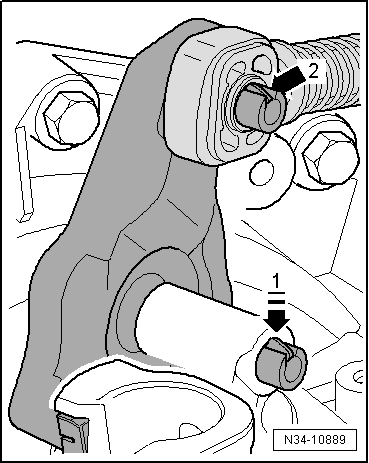
–  Press the clip down-arrow 1- as far as it goes and remove the rod together with the cable fastener.
  Note
Do not observe -item 2-.
Remove mounting element on plastic transfer lever
  Note
The idler rod must be removed.
  N34-10889
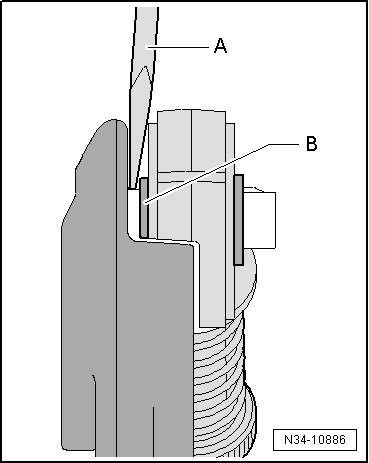
–  Place a flat tipped screwdriver-A- between the bushing -B- and the rod, pressing it out until it comes free of the pivot.
Install mounting element on plastic transfer lever
  Note
t  Lubricate the support points and contact surfaces with grease → Parts catalogue.
t  The idler rod must be removed.
  N34-10886
–  The fastener should only be fitted into the bushing-arrow-.
–  The cable fastener should run smoothly over the idler rod.
–  It must stay behind the tab
Install plastic transfer lever
  Note
Lubricate the support points and contact surfaces with grease → Parts catalogue.
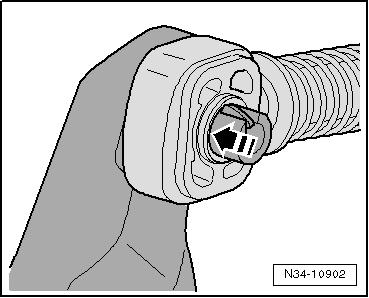
  N34-10902
–  Press the rod tab downwards and enter the lower axle into the pivot as far as it can go. It must stay behind the tab-arrow 1-.
  Note
Do not observe -item 2-.
–  The idler rod should move smoothly on its pivot.
  N34-10889

Gearbox?: removing and fitting > < Remove and install metal transfer lever