
Leon Mk2
| Clutch: assembly overview |
 Note
Note| t | Always replace clutch disks and pressure plates with damaged or loose rivet connection. |
| t | Assign clutch disk and pressure plate according to → Spare Spare parts catalogue and engine identification letters |
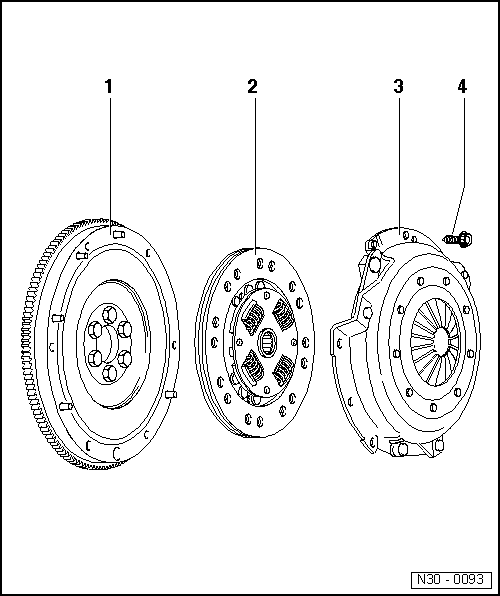
| 1 - | Flywheel |
| q | check that the centring pins are correctly seated |
| q | The contact surface with the clutch plate must be free of oil and grease with no grooves or seams |
| q | Removing and fitting the engine flywheel → Rep. gr.13 |
| 2 - | Clutch plate |
| q | Bore → Chapter |
| q | Lightly grease splines |
| q | Fitting position: the spring cage should point towards the clutch press. |
| q | Centring → Chapter |
Note| Clean the grooves on the input shaft and the clutch plate. For used clutch plates, clean of any corrosion. Apply a fine layer of grease → Spare Spare parts catalogue to the grooves of the input shaft. Then move the clutch plate on the input shaft from side to side, until the hub moves smoothly on the shaft. Eliminate excess grease |
| 3 - | Clutch press |
| q | Removing and fitting → Chapter |
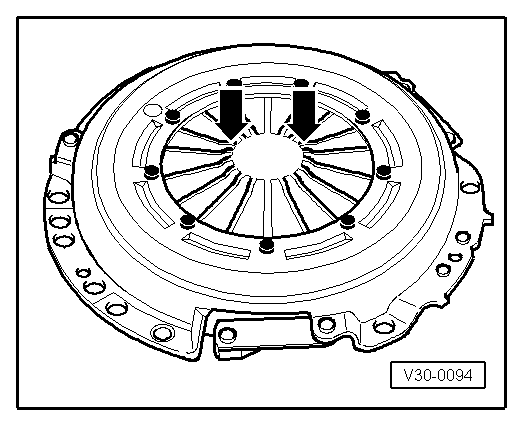
| q | Check the ends of the diaphragm → Fig. |
| q | Check flexible connection and riveted unions → Fig. |
Note| Pressure plates are protected against corrosion and greased. Only the contact surface can be cleaned; otherwise working life of the clutch will be reduced |
| 4 - | Bolt. |
| q | 20 Nm |
| q | Loosen and tighten diagonally in several stages |
| q | Allocation: → Parts catalogue |
|
|
