Leon Mk2
 Note
Note
|
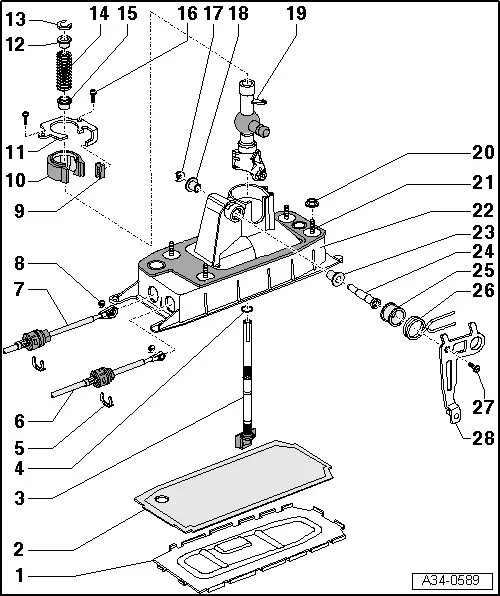
| 1 - | Base plate |
| q | Straighten tabs for removal |
| q | replace |
| 2 - | Seal |
| q | Replace if worn |
| 3 - | Gear lever |
| 4 - | O ring |
| q | Replace if worn |
| 5 - | Securing clip |
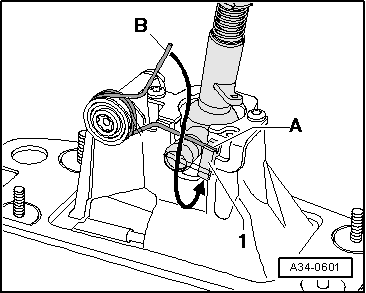
| 6 - | Selection control cable |
| q | removing and fitting → Chapter |
| q | Adjust convergence → Chapter |
| 7 - | Gear selector cable |
| q | removing and fitting → Chapter |
| q | Adjust convergence → Chapter |
| 8 - | Retainer washer |
| 9 - | Frame |
| q | For compression spring → Item- |
| 10 - | Bearing shell with damper element |
| 11 - | Panel |
| 12 - | Thrust piece |
| 13 - | Retainer washer |
| q | removing and fitting → Fig. |
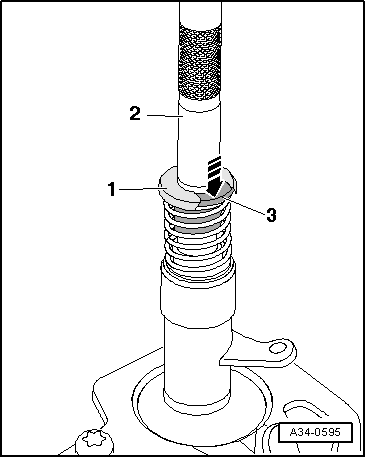
| 14 - | Compression spring |
| 15 - | Thrust piece |
| 16 - | Bolt, 6 Nm |
| 17 - | Retainer washer |
| 18 - | Mounting bush |
| 19 - | Gear lever guide |
| 20 - | 10 Nm |
| 21 - | Seal |
| q | Between gear lever casing and vehicle underbody |
| q | Self-adhesive |
| 22 - | Gear lever casing |
| 23 - | Mounting bush |
| 24 - | Bearing pin |
| 25 - | Guide sleeve |
| q | Press into gear lever casing |
| 26 - | Compression spring |
| q | Fitting → Fig. |
| 27 - | 5 Nm |
| 28 - | Selector bracket |
|
|