seat Workshop Repair Guides

SEAT Workshop Service and Repair Manuals

Subframe lining - installation > < Subframe lining - removal and assembly
Subframe lining - removal
  WARNING
Disconnect the battery earth strap before carrying out any work on the electrical system.
  Note
During removal and installation, take note of small amounts of deviations depending on the equipment.
–  Remove the front door glass → Chapter.
   
–  Remove the multi-contact connector -8- located below the rubber bellows on the A-pillar.
–  Unscrew bolts -4- and -5-.
–  Unscrew bolts -6- and -7-.
–  Remove the inner trim -1- using the lever -T20043-.
–  Detach connector from the mirror -2-.

–  Remove lock cylinder housing → Chapter.
   
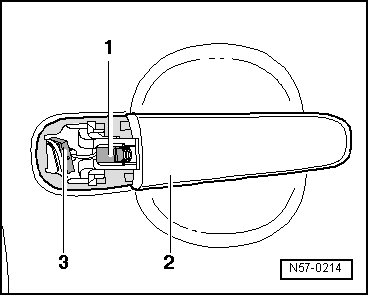
–  Remove the clip -1- of the door handle -2-.
  N57-0214
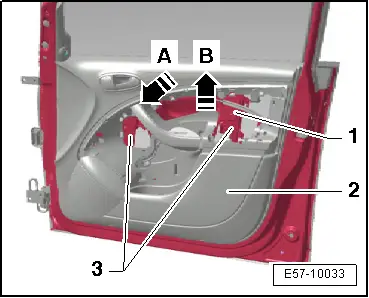
–  Slightly separate the subframe lining -2- from the door frame-1-, by sliding it first in the direction of -arrow B-, then in the direction of -arrow A-.
–  Free the two guides -3- from the frame -1-.
–  Extract the multi-contact connector cable from the staples fastening it to the frame -1-.
–  Completely remove the lining -2- from the frame -1-.
  Note
On removing the subframe lining take care not to damage the lock.
  E57-10033

Subframe lining - installation > < Subframe lining - removal and assembly