| –
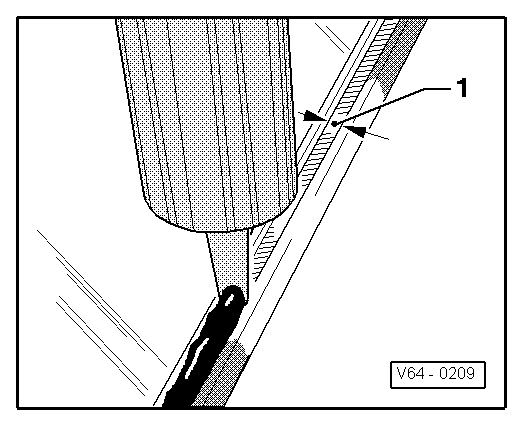
| Apply adhesive using the cartridge glue gun -SAT 5360- or cartridge glue gun -SAT 5350- around the window perimeter, onto the primer coat -1- or onto the trimmed bead of adhesive, at right angles to the glass. |

WARNING | The window must have been fitted 10 minutes after applying the glue seam. Fitting at a later time results in the following adhesive effect. |
|
| Continue for the windscreen |
| –
| Insert the window with the suction cups -VAG 1344- into the window cut-out. In doing so, use the roof as a reference line. |
| –
| Attach the setting wedge. |
| –
| Fold the window upwards and lay on the setting wedges. |
| –
| Apply the spacer blocks. |
| –
| Check the tolerance of the disc to the roof. |
| –
| Remove the setting wedges and spacer blocks again |
| –
| Fit the grille below the windscreen → Chapter. |
| –
| Paste any stickers needed on the window (e.g. for the airbag). |
| –
| Install the rain and light recognition sensor -G397- holder if it has not already been installed → Chapter. |
| –
| Install the rain and light recognition sensor -G397- → Chapter. |
| Continue for the rear window |
| –
| Insert the rear window with the suction cups -VAG 1344- into the window cut-out. In doing so, use the roof as a reference line. |
| –
| Fit a rubber joint for the rear window wiper motor axle to the rear window. |
| –
| Fix the rear window with adhesive tape during the hardening time. |
| –
| If the glue seam has been applied too thick and glue runs into the area of the rear window heating, remove the excess glue as soon as it is dry. |
|
|
|
