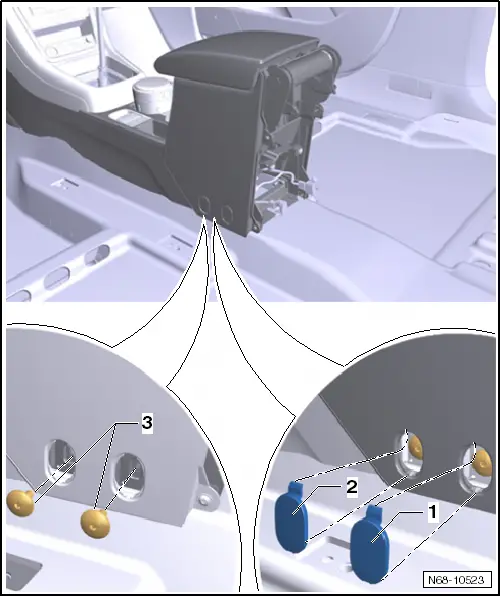
seat Workshop Repair Guides

SEAT Workshop Service and Repair Manuals

Removing and installing centre console extension > < Required special tools, workshop equipment, test and measuring devices and auxiliary items
Removing and installing centre console
Removing
–  Switch off ignition.
–  Remove button module in storage compartment in centre console → Electrical system; Rep. gr.96.
–  Remove holder for switch unit, centre console → Chapter.
–  Remove gearstick sleeve or gear selector cover from the mountings → Rep. gr.34.
–  Remove centre console cover → Chapter.
–  Remove footwell side trims → Chapter.
–  Remove trim, centre console, rear → Chapter.
–  Remove centre console extension → Chapter.
–  Remove button for electromechanical parking brake and button for AUTO HOLD → Electrical system; Rep. gr.96.
–  Place front seats in foremost sitting position.
   
–  Using a small screwdriver, unclip covers -1- and -2-.
–  Unclip the covers on the opposite side as well.
–  Unscrew 2 bolts -3- (6.0 Nm).
–  Also remove the 2 screws on the opposite side (6.0 Nm).
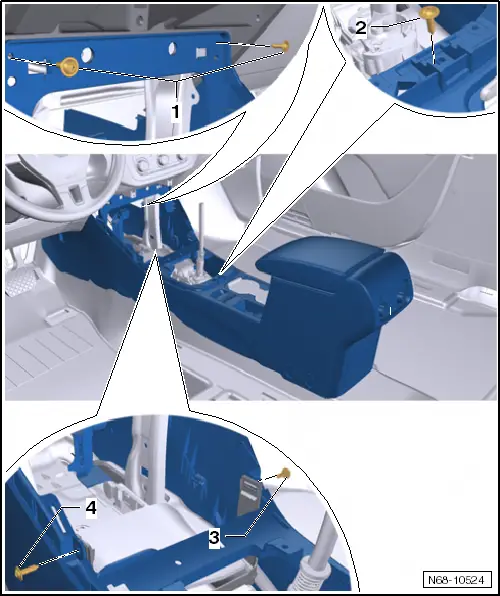
   
–  Remove bolts -1-, -2-, -3- and-4- (1.5 Nm).
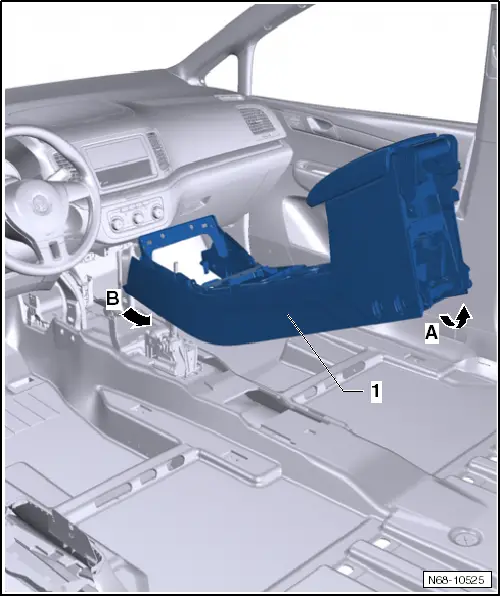
   
–  Pull aerial 1 in interior for access and start authorisation -R138--1- vertically upwards out of its detent, taking into account the lengths of the connected wires.
  N94-12044
–  Lift up centre console -1- at rear -arrow A-.
–  Unclip centre console (at front) from dash panel -arrow B-.

Installing
–  Install in reverse order of removal.
   

Removing and installing centre console extension > < Required special tools, workshop equipment, test and measuring devices and auxiliary items