seat Workshop Repair Guides

SEAT Workshop Service and Repair Manuals

Seat trim with drawer: Fitting > < Seat trim with drawer: removing and fitting
Seat trim with drawer: removing
  Note
t  Before working with the airbag system, always read the safety precautions → Chapter.
t  Pay attention to coding (obtain as necessary) for vehicles with coded radio/radio navigation system (RNS).
t  For ease of removal it is recommendable to set the seat in the highest position.
–  With ignition switched off, disconnect earth connection from battery.
–  Remove the front seat → Chapter.
  Note
The side airbag adapt. -VAS 5232- should be always connected in the dismounting procedure.
   
–  Position the rear seat in the seat bracket -T20172/5-.
–  Removing front seat belt closing → Chapter.
  E74-10018
–  Remove the seat back adjustment knob -8- with the help of the pliers -T20065-.
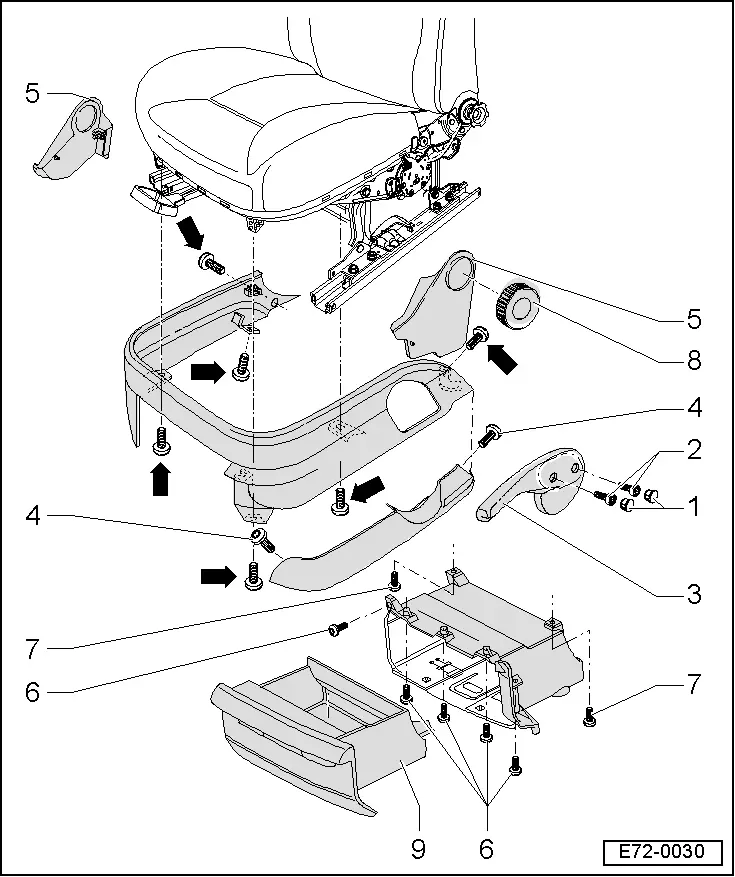
–  Unclip the two caps -1-, remove the two torx bolts -2- and remove the adjustment lever -3-.
  Note
When removing the caps, check their condition and replace where necessary.
–  Carefully unclip the left and right covers -5-.
–  Remove the torx bolts -4- from the guide cover and unclip the guide cover upwards.
–  Lift the drawer out -9-.
–  Extract the front bolts -6-.
–  Extract the rear bolts -7-.
–  Remove the drawer support.
–  Extract the attachment bolts -arrows- for the seat trim.
–  Remove the seat trim.


Seat trim with drawer: Fitting > < Seat trim with drawer: removing and fitting