
Leon Mk2
 Note
Note
|
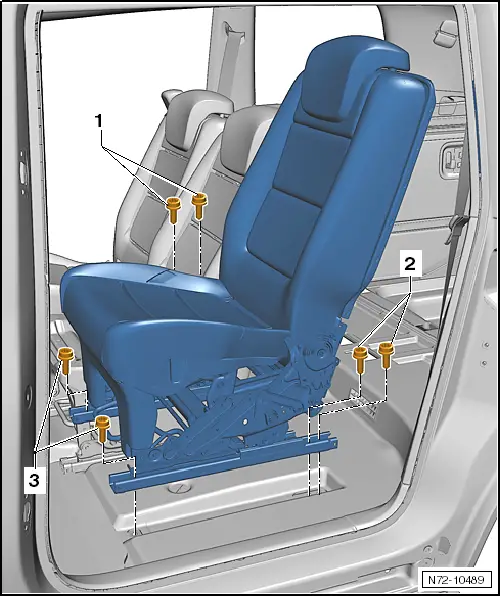
| – | Undo and remove bolts -1-, -2- and -3- (25 Nm). |
 WARNING
|
| – | Disconnect the electrical connectors, depending on vehicle equipment. |
| – | Connect airbag adapter -VAS 6282- to side airbag wiring harness. |
 Caution
|
Caution
|
| – | Remove seat from vehicle. |
|