Leon Mk2
| Vehicles with different luggage compartment floors |
| – | Remove the luggage compartment floor from the vehicle. |
 Caution
|
| All vehicles |
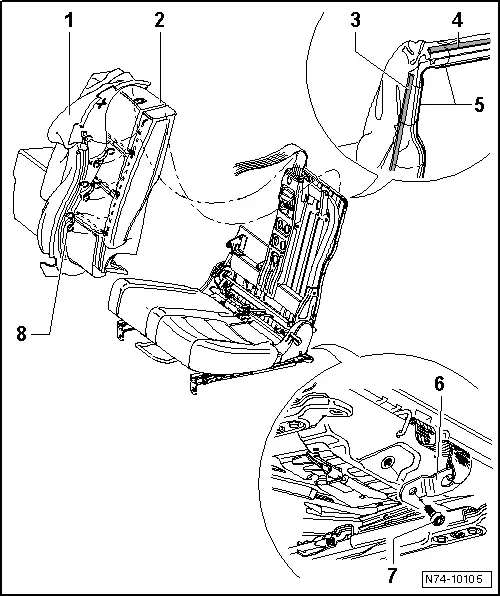
| – | Undo the screw -4- (6 Nm) and remove the spring element -5- from the slide piece -6-. |
Caution
|
| – | Return the backrest to its correct position. |
| – | Press the locking mechanisms -arrows- and release the trim of the seat belt -2- from the mount. |
 Note
Note| The trim of the seat belt -2- can only be used once which means it has to be replaced when reinstalling. |
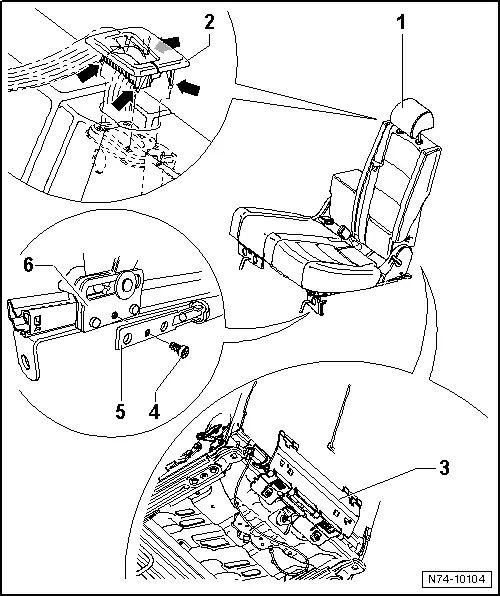
| – | Undo the screw -7- (40 Nm) and remove the rear fitting of the seat belt -6- from the seat. |
| – | Remove the safety belt towards the front. |
Note| When installing, the rear fitting of the seat belt cannot be inserted via the ISOFIX securing plate. |
| – | Remove the upholstery profile -3- and -4- from the mounts -5- on the backrest frame. |
| – | Remove the upholstery from the sides -1-. |
| – | Remove the clips -8-. |
Note| The clips -8- will be damaged when removing. They must be renewed when installing. Use the Pressure tool -T20069-. |
| – | Remove the upholstery -1- and padding -2- from the backrest frame. |