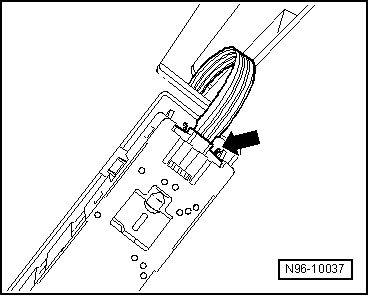
seat Workshop Repair Guides

SEAT Workshop Service and Repair Manuals

Sunroof lining, fitting > < Sunroof lining: removal and assembly
Sunroof lining, removal
  WARNING
Before working on the electrical system, disconnect the battery earth strap.
  Note
t  When the battery is reconnected check the vehicle equipment (radio, clock, power windows), following the indications in the Operating Instructions.
t  Removal and assembly will be carried out taking into consideration small differences depending on the vehicle's equipment.
t  
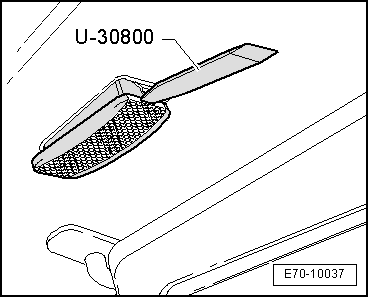
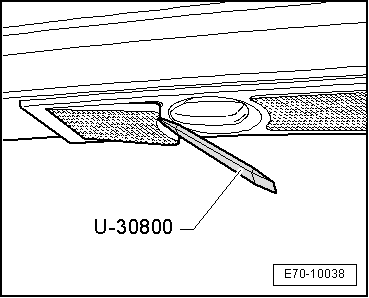
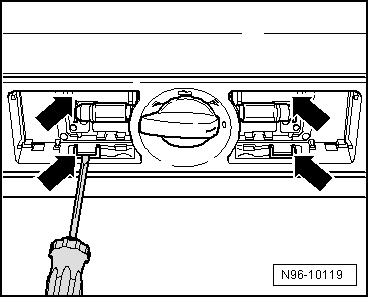
To avoid stains use gloves when removing roof linings.
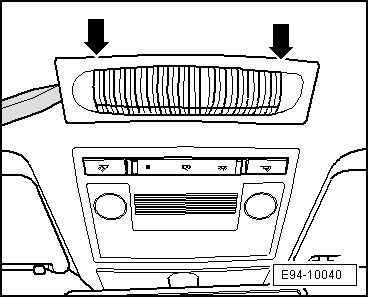
–  Switch off the ignition and all the electrical components.
–  Disconnect the vehicle battery → Starter motor, voltage supply; Rep. gr.27.
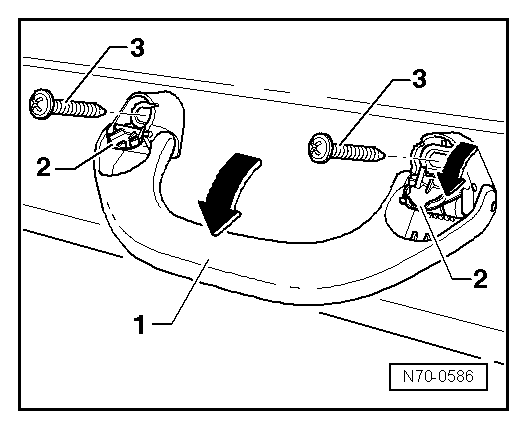
–  Remove upper linings from struts A → Chapter.
–  Remove upper linings from struts B → Chapter.
–  Remove upper linings from struts C → Chapter.
   
Dismount handgrips
–  Open the covers -2- downwards -arrow- using the lever -U 30800-.
–  Loosen bolts -3- tightening torque 2 Nm and remove hand grip -1-.
–  Dismount interior mirror → Chapter.
  N70-0586
Dismount courtesy light for sunshade mirror
–  Detach the courtesy mirror lamp using the lever -U 30800-.
  E70-10037
–  Unplug electrical connector -arrow-.
  E96-10052
Remove rear courtesy lamp
–  Detach the courtesy lamp glass using the lever -U 30800-.
  E70-10038
–  Undo the mountings -arrows- of the unit and remove unit.
  N96-10119
–  Separate electrical connection-arrow-.
  N96-10037
Dismount front courtesy lamp
–  Extract the unit by pressing with the lever -U 30800-.
  E96-10049
–  Separate the electrical connectors -1- for the light power supply and -2- roof opening and closing switch.
–  Unscrew bolts → Item.
  E96-10050
–  Unhook retaining clip -arrows- and remove interior monitoring sensor -G273-.
  E94-10040
–  Disconnect electrical connector -1- and remove cover on interior monitoring sensor -G273-.
  E94-10041
Dismount sunshade and support
–  Unclip the sunshade -1- from the fastening -2-.
–  Remove cowling -5- using the lever -U 30800-.
–  Unscrew the bolt -4- tightening torque 2 Nm.
–  Remove fitting -3- from its housing and remove the sunshade.
–  Where applicable, disconnect the switch for the courtesy mirror light.
–  Remove cowling -6- using the lever -A 71101-.
–  Loosen bolts -7- (2x) tightening torque 2 Nm and remove fastening -2-.
–  Fold down front and rear seats
  E68-0047
  WARNING
To avoid damage being caused to the roof trim, place the wedge -T10039/1- in the middle and undo the first clip. The trim must be loosened downwards to be able to reach and undo the next clip. In doing so, do not damage the roof lining.
–  Apply the wedge -T10039/1- between the frame -1- and the trim of the sliding / tilting sunroof -2- beginning in the middle.
–  Remove headliner from clips at circumference of outer frame using lever -T10039- in direction of -arrow-.
–  Loosen clips → Item from bracket using lever -T20043-.
Continue only for vehicles with power supply
–  Use the → Item lever to remove the plugs -U 30800-.
–  Unscrew the screws → Item and remove the fixing cover of the power supply.
Continued for all vehicles
–  Release the roof lining and remove through the rear part out of the vehicle. Take special care that the trims do not bend.
  Note
Insert a protective device between the surface where the trim should be lent against and its contact surface to prevent the possibility of dirt entering.


Sunroof lining, fitting > < Sunroof lining: removal and assembly