
Leon Mk2
|
 Note
Note
|
|
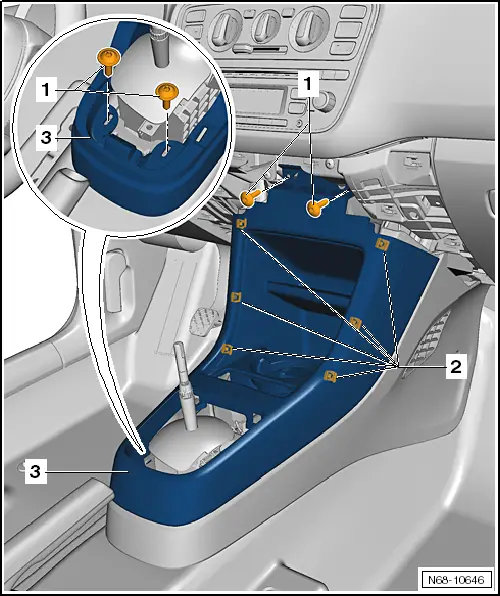
| – | Switch off ignition. |
| – | Remove middle dash panel trim → Chapter. |
| – | Position handbrake lever in uppermost position. |
| – | Release selector mechanism sleeve from cover and pull upwards. |
| – | Remove bolts -1- (1.5 Nm). |
| – | Release centre console -3- from retaining clips -2- by pulling to rear. |
| – | Disconnect wiring harnesses and plug as you do so, depending on vehicle equipment level. |
| – | Remove centre console upper part -3- from lower part. |
Note
|