SEAT Workshop Service and Repair Manuals
HOME
FEATURES
MENU
INDEX
ABOUT US
Removing and installing side trim >
< Removing and installing C-pillar trim, 2-door models
Leon Mk2
Body
General body repairs, interior
Trim, noise insulation
Interior trims / moving_and_installing_c-pillar_trim/">Removing and installing C-pillar trim
Releasing and securing C-pillar trim
Releasing and securing C-pillar trim
Releasing and securing C-pillar trim
Special tools and workshop equipment required
t
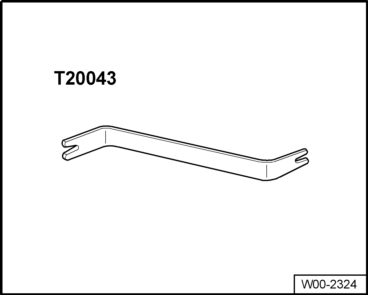
Release lever -T20043-
t
Release lever -U30800-
Releasing
Note
Releasing and securing are described for the left side of the vehicle. Releasing and securing on the right side of the vehicle is similar.
–
Remove the rear tray.
–
Fold down rear bench seat backrest on left side.
–
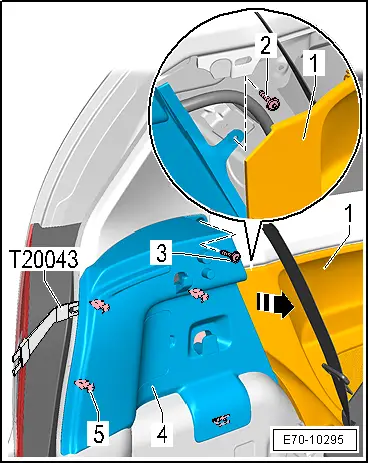
Partially remove the side trim
-1-
in the direction of the
-arrow-
in order to be able to access screw
-2-
.
–
Unscrew the bolts
-2-
and
-3-
.
–
Loosen the luggage compartment trim
-4-
from the fasteners of the clips
-5-
using the lever -T20043-.
–
Detach luggage compartment trim
-4-
.
–
Release the trim
-1-
from the clip fasteners
-2-
using the lever -T20043- and remove from the trim.
Securing
Note
t
Before installing, check all fasteners for damage and renew if necessary.
t
Ensure that C-pillar trim is correctly inserted in retaining clips.
t
Following installation, ensure that trim is positioned in door seal beading.
Secure in reverse order of releasing.
Body
General body repairs, interior
Trim, noise insulation
Interior trims / moving_and_installing_c-pillar_trim/">Removing and installing C-pillar trim
Releasing and securing C-pillar trim
Removing and installing side trim >
< Removing and installing C-pillar trim, 2-door models
 Note
Note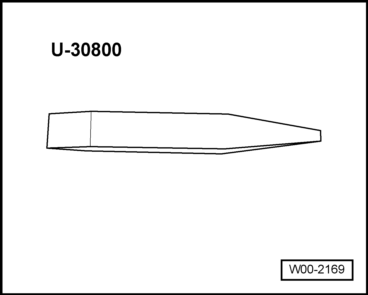
 Note
Note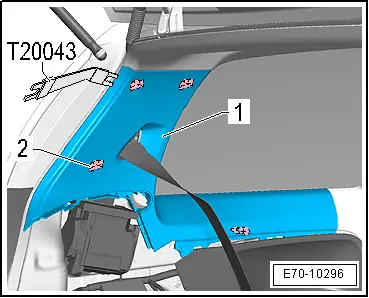
 Note
Note
Note
Note