seat Workshop Repair Guides

SEAT Workshop Service and Repair Manuals

Side trim in the luggage compartment, commercial vehicles: Assembly overview > < Side trim in the luggage compartment, vehicles with?3 and 5?doors: fitting Assembly overview
Side trim in the luggage compartment, vehicles with 3 and 5 doors: fitting Removing and installing.
Special tools and workshop equipment required
   
t  Release lever -T20043-
  W00-2324
t  Torque wrench kit -SAT 8010-
  L00-10226
Removal:
–  Remove the upper lining of strut B → Chapter.
–  Remove rear bench seat → Chapter.
–  Fold down the rear seat backrest. → Chapter.
–  Remove side trim → Chapter.
–  Open the tailgate.
–  Remove cover on rear lock support → Chapter.
–  Remove the tray compartment.
–  Remove the upper lining of strut C → Chapter.
–  Remove floor covering in luggage compartment.
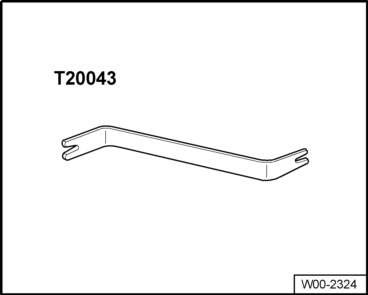
–  Detach cover -3- and threaded bushing -2- with lever -T20043-.
–  Remove handle socket-5-
–  Remove bolts for fastening hooks-7-.
–  Remove side trim in boot -6-.

Installation
Installation is carried out in the reverse order. When installing, note the following:
  Note
Before fitting the lining check the condition of the caps and replace if necessary.
   

Side trim in the luggage compartment, commercial vehicles: Assembly overview > < Side trim in the luggage compartment, vehicles with?3 and 5?doors: fitting Assembly overview