
Leon Mk2
 Note
Note
|
|
|
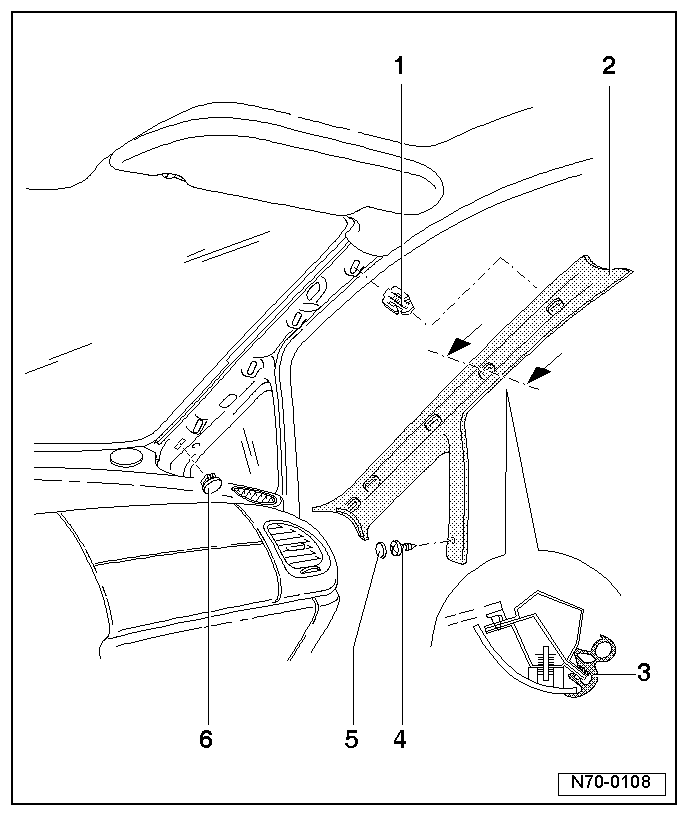
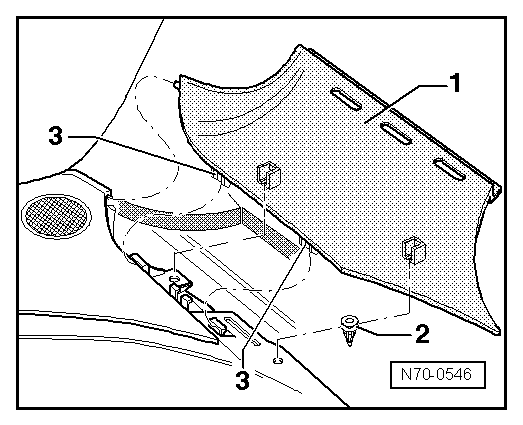
| 1 - | Clip |
| q | Destroyed during removal |
| 2 - | Trim panel |
| q | Removing: |
| – | Lever out cover → Item and remove cross-head screw → Item |
| – | Unclip trim from A-pillar, starting from top, and pull out lower front area off clip → Item upwards |
| q | Installing: |
| – | Lever clips → Item out of mounting holes of A-pillar, replace with new ones and insert in trim mountings |
| – | Further installation is performed in the reverse order of removal |
| 3 - | Seal |
| q | Ensure seal is seated correctly after installing trim |
| 4 - | Cross-head screw |
| 5 - | Cover |
| q | Lever out |
| 6 - | Clip |