| –
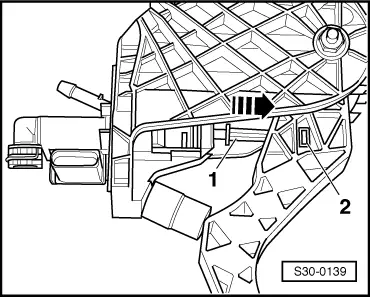
| Place a spacer -A- between clutch pedal and stop and press clutch pedal forwards. |
| t
| Length of spacer = approx. 40 mm |
| –
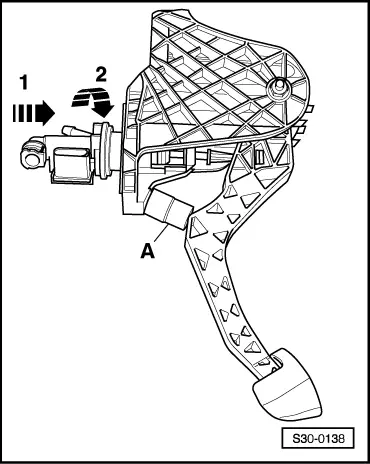
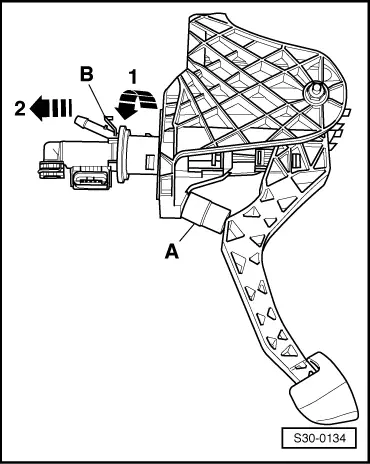
| Release release pin -B- and pull master cylinder out of bracket -arrow 1- and -arrow 2-. |
| l
| Move clutch pedal up to the stop into home position. |
|
|
|