
Baja F4-2.5L SOHC (2003)
Vacuum Brake Booster: Service and Repair
Brake Booster
REMOVAL
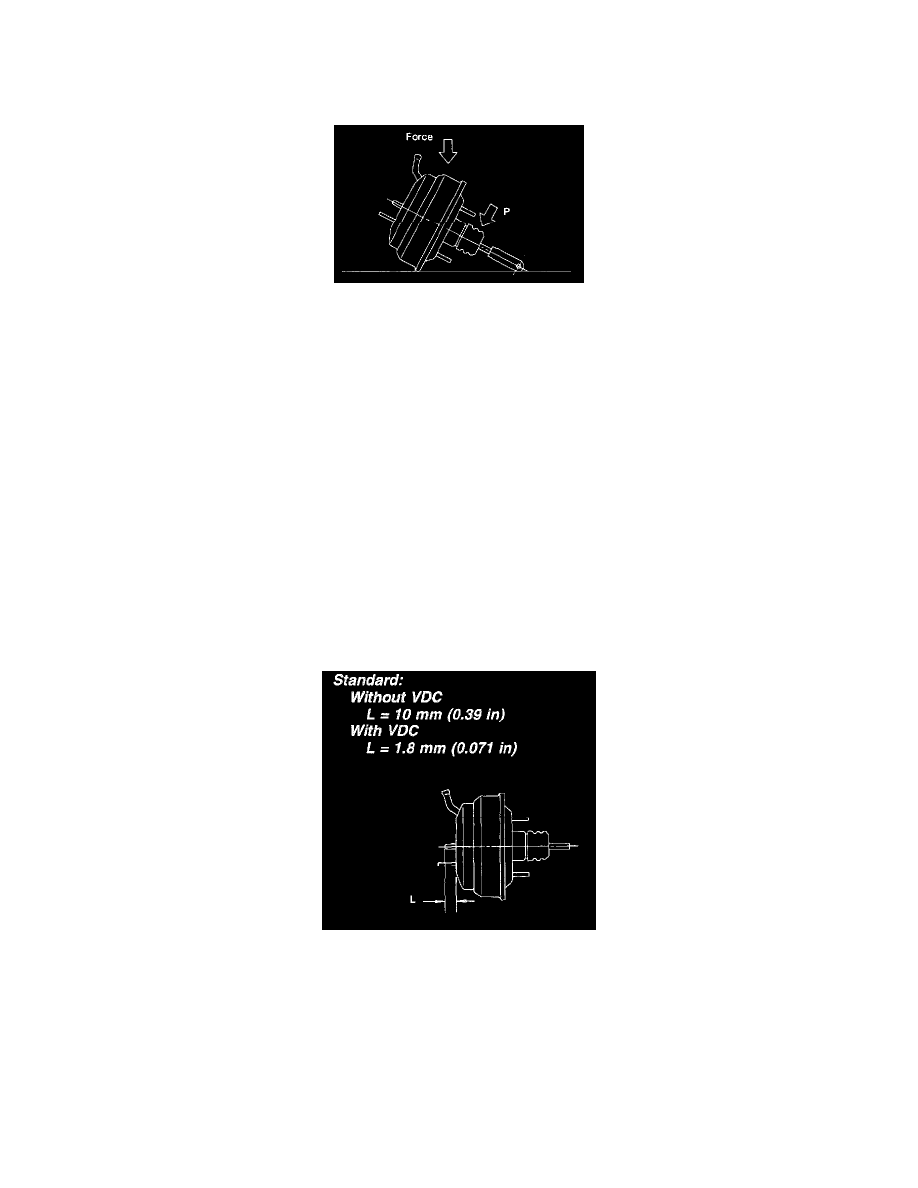
CAUTION: If external force is applied from above when brake booster is placed in this position, the resin portion as indicated by "P", may be
damaged.
1. Pull up parking brake lever, and block tires.
2. Disconnect battery ground cable.
3. Remove or disconnect the following parts at engine compartment.
1. Disconnect connector for brake fluid level indicator.
2. Remove brake pipes from master cylinder.
3. Remove master cylinder installing nuts.
4. Disconnect vacuum hose from brake booster.
4. Remove the following parts from the pedal bracket.
1. Snap pin and clevis pin
2. Four brake booster installing nuts
5. Remove brake booster while shunning brake pipes.
NOTE:
^
Be careful not to drop brake booster. Brake booster should be discarded if it has been dropped.
^
Use special care when handling operating rod. If excessive force is applied to operating rod, sufficient to cause a change in the angle in excess
of ±3°, it may result in damage to the power piston cylinder.
^
Use care when placing brake booster on the floor.
^
Do not change the push rod length. If it has been changed, reset the projected length "L" to the standard length.
Standard:
Without VDC
L = 10 mm (0.39 inch)
With VDC
L = 1.8 mm (0.071 inch)
INSTALLATION
1. Mount brake booster in position.