
Impreza Brighton Coupe AWD F4-2.2L SOHC (1997)
2. Rear bushing:
a. Scribe an aligning mark on transverse link and rear bushing.
b. Loosen nut and remove rear bushing.
INSPECTION
1. Check transverse link for wear, damage and cracks, and correct or replace if defective.
2. Check bushings for cracks, fatigue or damage.
3. Check rear bushing for oil leaks.
ASSEMBLE
1. Front bushing: To reassemble, reverse disassembly procedures.
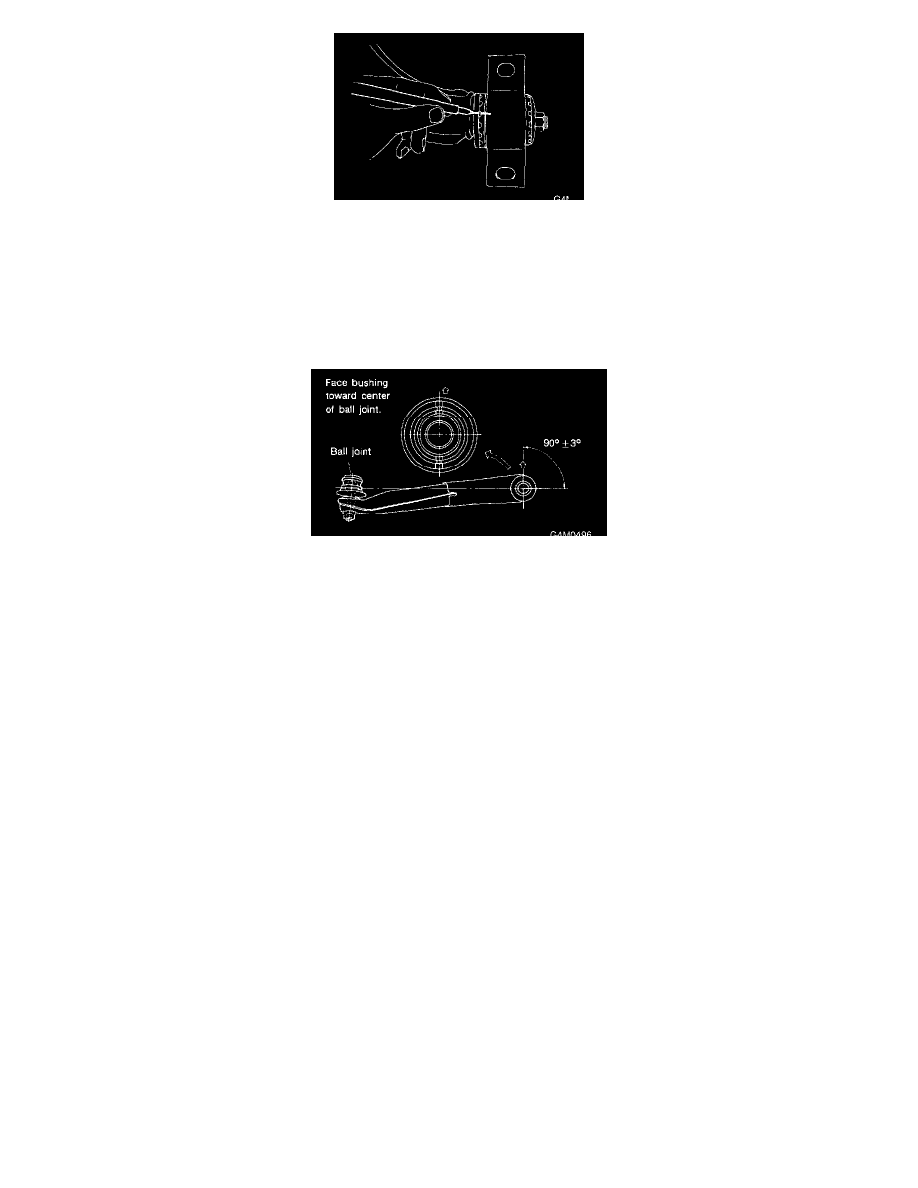
CAUTION: Install front bushing in correct direction, as shown in figure.
2. Rear bushing
a. Install rear bushing to transverse link and align aligning marks scribed on the two.
b. Tighten self-locking nut.
CAUTION:
^
Discard loosened self-locking nut and replace with a new one.
^
While holding rear bushing so as not to change position of aligning marks, tighten self-locking nut. Tightening torque: 196 ± 25 Nm (145 ±
18 ft.lbs.).
INSTALLATION
1. Temporarily tighten the two bolts used to secure rear bushing of the transverse link to body.
NOTE: These bolts should be tightened to such an extent that they can still move back and forth in the oblong shaped hole in the bracket (which
holds the bushing).
2. Install bolts used to connect transverse link to crossmember and temporarily tighten with nuts.
CAUTION: Discard loosened self-locking nut and replace with a new one.
3. Insert ball joint into housing.