
Impreza GT F4-2.5L Turbo (2009)
NOTE:
If faulty, check precisely with gauges.
-
LOADED AIR TIGHTNESS CHECK
Depress the brake pedal while the engine is running, and turn the engine to OFF while the pedal is depressed. Keep the pedal depressed for 30
seconds. If the pedal height does not change, the function of brake booster is normal. If the pedal height increases, it is faulty.
NOTE:
If faulty, check precisely with gauges.
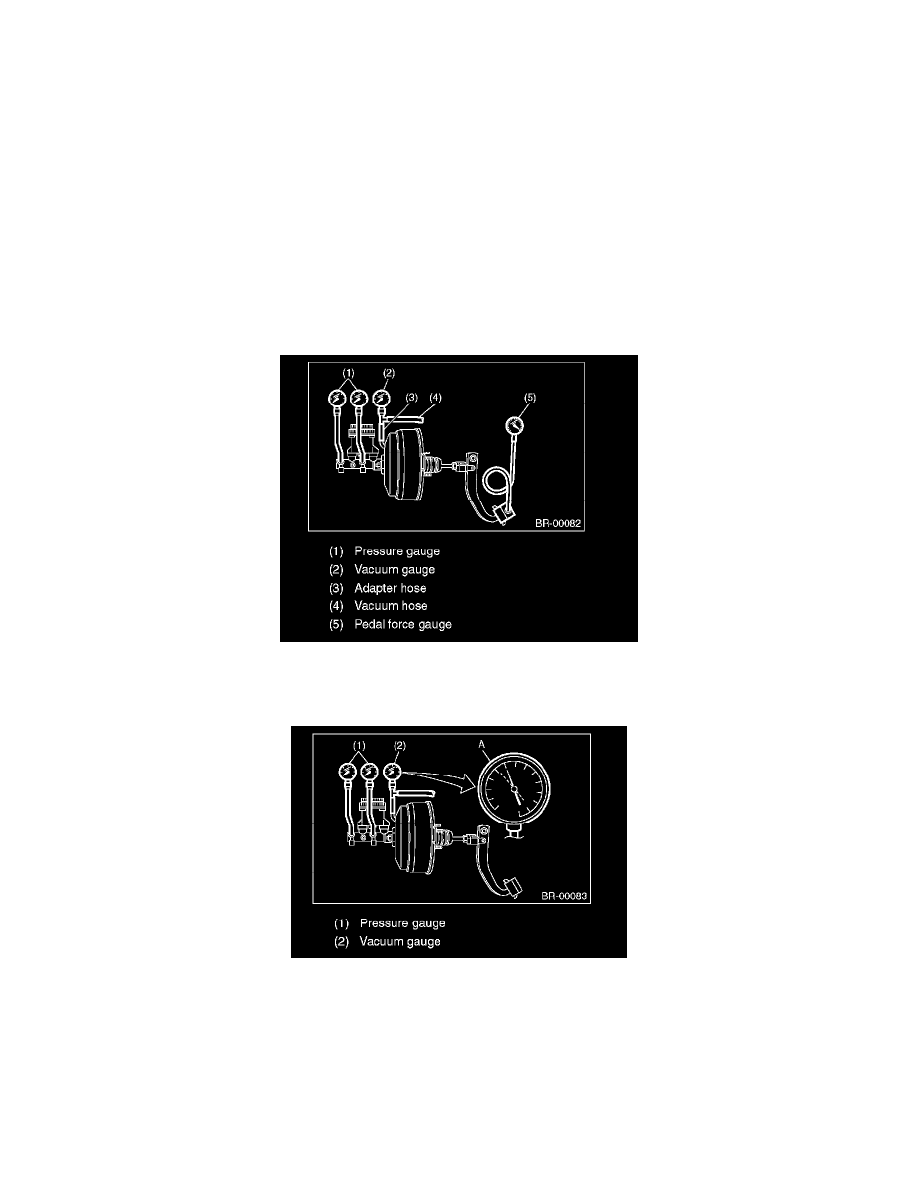
OPERATION CHECK (WITH GAUGE)
CAUTION:
When checking operation, be sure to apply the parking brake securely.
-
CHECK WITH GAUGE
Connect the gauge as shown in the figure. After bleeding air from the pressure gauge, perform each check.
-
AIR TIGHTNESS CHECK
1) Start the engine and keep it running until vacuum pressure indicates point A of the vacuum gauge = 66.7 kPa (500 mmHg, 19.69 inHg). Do not
depress the brake pedal at this time.
2) Stop the engine and check the gauge. If the vacuum pressure drop within 15 seconds after stopping the engine is 3.3 kPa (25 mmHg, 0.98 inHg) or
less, the function of brake booster is normal.
If faulty, the cause may be one of the following.
-
Check valve malfunction
-
Leak from vacuum hose
-
Leak from shell joint section or stud bolt welded section
-
Damaged diaphragm
-
Leak from valve body seal and bearing section
-
Leak from plate and seal assembly section
-
Leak from poppet valve assembly section