
Legacy F4-2.5L SOHC (2003)
Necessary tools and supplies:
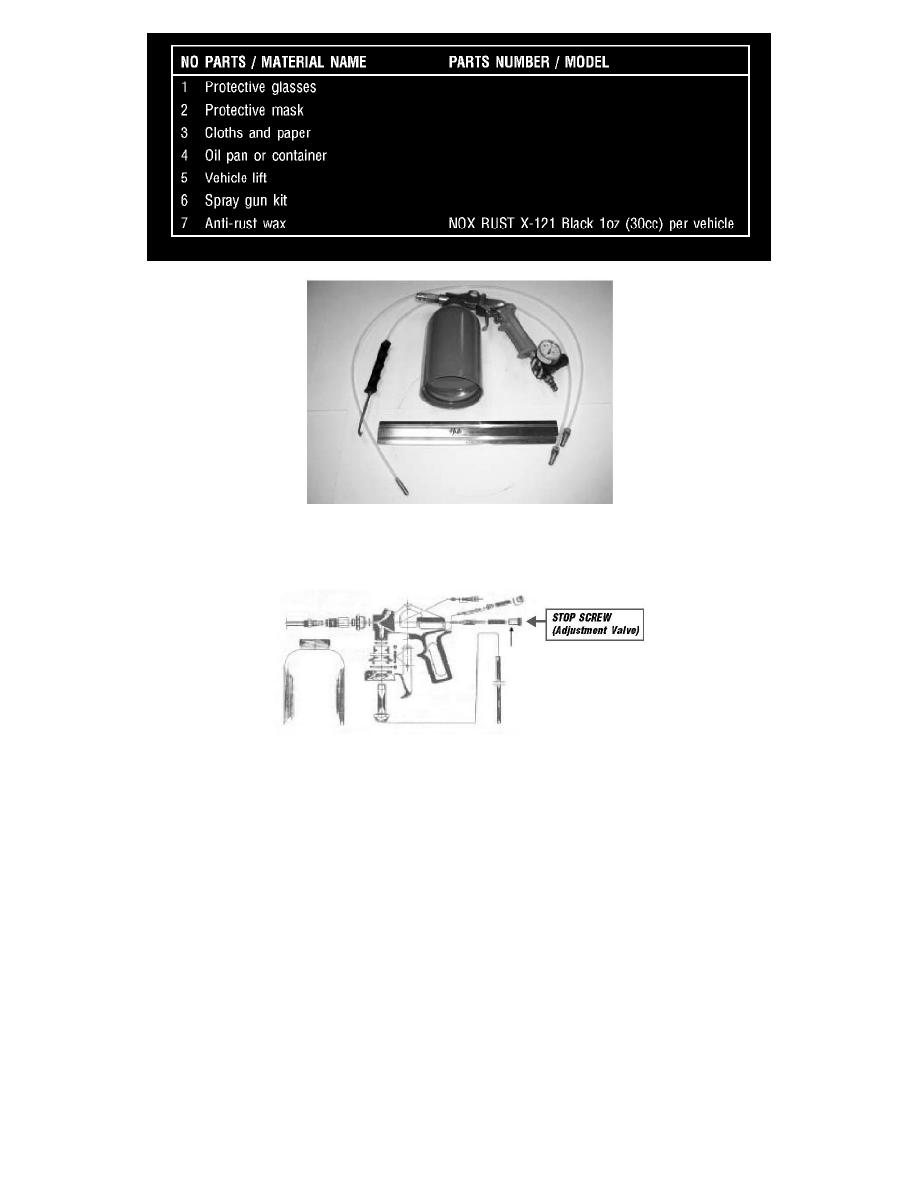
SPRAY EQUIPMENT OPERATING INSTRUCTIONS
The pressure pot is equipped with an adjustment valve (or stop screw) to adjust the ratio of pro duct to air. This adjustment valve will have to be adjusted
in order to achieve optimal spray pattern for each material. The adjustment valve is identified in the diagram below.
Before filling the gun, turn the stop screw clockwise until completely closed. Draw a line down the middle of the stop screw using a marker. This line
will be used to determine the number of turns needed for optimal spray of the waxes.
Settings For Nox-Rust(R) X-121 Black Corrosion Preventive Coating
(Note: Product should he room temperature for proper application.)
When using the 360° flexible wand, turn the stop screw counterclockwise 3 turns from closed, and adjust the air pressure to 80 psi.
Gun Disassembly And Cleanout
1)
Turn the spray gun stop screw (as pictured above) clockwise until completely closed. Blow the 360° flexible wand clear with air by pulling the
spray gun trigger.
2)
Disconnect the gun from the air supply.
3)
Remove the spray tube using the quick disconnect.
4)
Relieve the pressure from the gun by slowly turning the paint pot to the left until all the air escapes. Do not use the gun trigger to relieve pressure
from the pot. This will cause the wax to flow into the air line supply of the gun.