
Legacy F4-2.5L SOHC (2003)
Clutch Pedal Assembly: Service and Repair
Clutch Pedal
REMOVAL
1. Remove the steering column.
2. Disconnect the connectors from stop light and clutch switches.
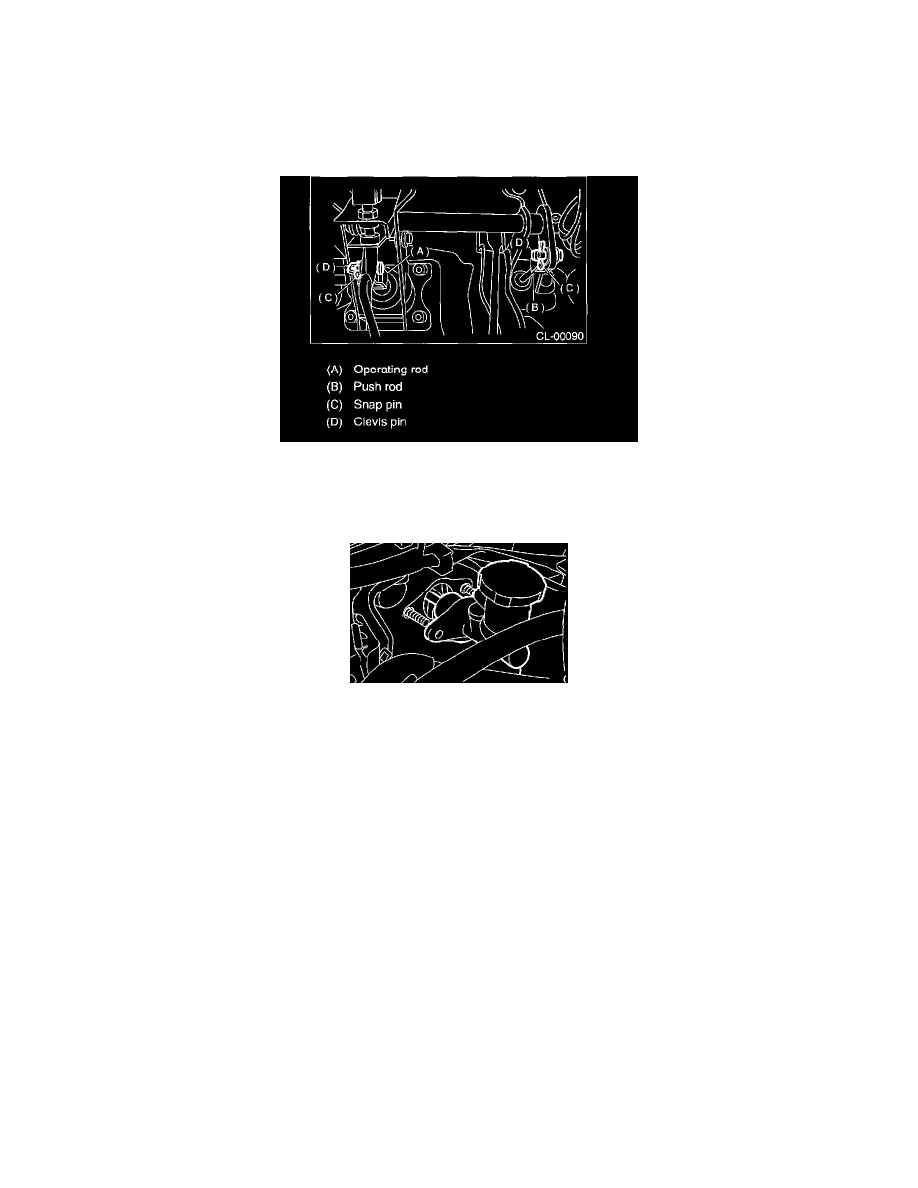
3. Remove the snap pins which secure lever to push rod and operating rod.
4. Remove the clevis pins which secure lever to push rod and operating rod.
5. Remove the accelerator pedal.
6. Remove the air intake chamber and air intake duct. (3.0 L model)
7. Remove the air cleaner case and intake duct. (2.5 L model)
8. Remove the nut which secures clutch master cylinder.
9. Remove the bolts and nuts which secure brake and clutch pedals, and remove the pedal assembly.
INSTALLATION
1. Install in the reverse order of removal.
Tightening torque: 18 Nm (1.8 kgf-m, 13.0 ft. lbs.)
NOTE:
^
Be careful not to kink the accelerator cable.
^
Always use new clevis pins.
2. Adjust the clutch pedal after installation.
3. Adjust the clutch switch (starter interlock).
DISASSEMBLY