
Legacy F6-3.0L (2005)
Brake Master Cylinder: Service and Repair
REMOVAL
CAUTION: Do not allow brake fluid to come in contact with vehicle body; wash away with water and wipe off completely if spilled.
1. Thoroughly drain the brake fluid from reservoir tank.
2. Disconnect the fluid level gauge harness connector.
3. Remove the brake pipes from master cylinder.
4. Remove the master cylinder mounting nuts, and take out the master cylinder from brake booster.
INSTALLATION
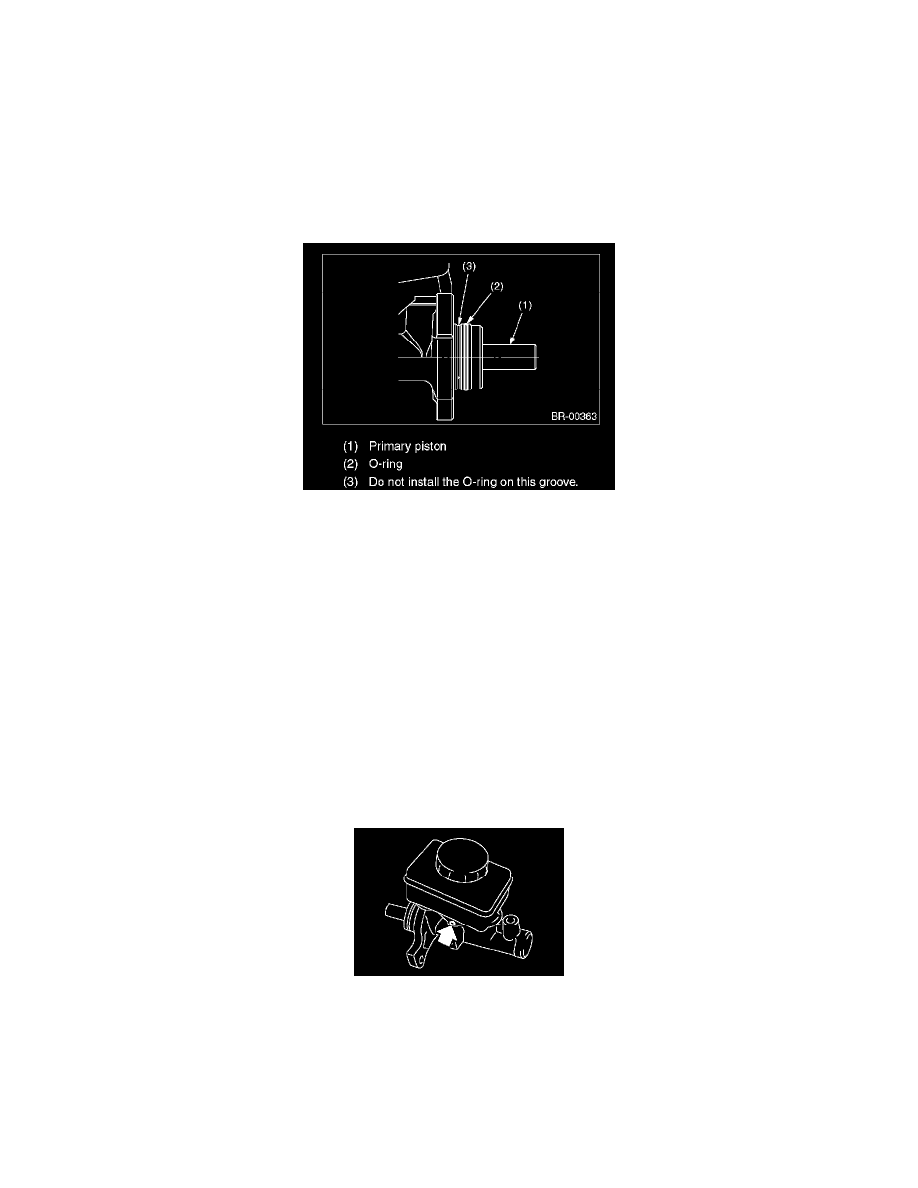
1. Replace the O-ring for the master cylinder with a new one.
CAUTION: Do not install the O-ring in wrong place.
2. Install in the reverse order of removal.
Tightening torque: Master cylinder mounting nut 13 Nm (1.3 kgf-m, 9.6 ft. lbs.)
Piping flare nut Model with ABS 15 Nm (1.5 kgf-m, 10.8 ft. lbs.)
Model with VDC 19 Nm (1.9 kgf-m, 14.0 ft. lbs.)
CAUTION: Be sure to use recommended brake fluid.
3. Bleed air from brake system.
REPLACEMENT
1. Remove mud and dirt from the surface of brake master cylinder.
2. Secure the master cylinder on a vise.
NOTE: To avoid damaging master cylinder, use aluminum plate while holding with vise.
3. Remove the pin which secures the reservoir tank to master cylinder, and then remove the reservoir tank and seal.