
Legacy F6-3.0L (2005)
Ball Joint: Service and Repair
Front Ball Joint
REMOVAL
1. Lift-up the vehicle and remove the front wheels.
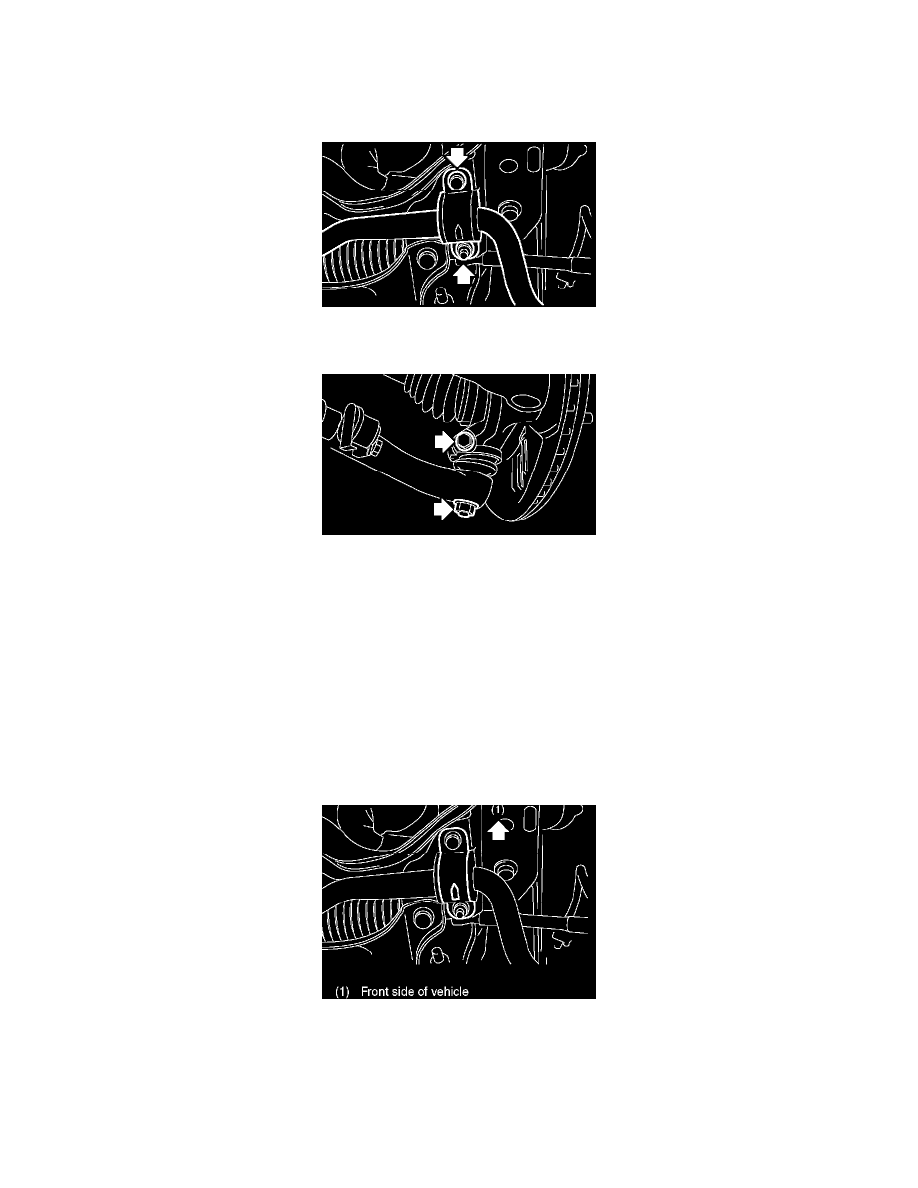
2. Remove the both sides of stabilizer bracket.
3. Pull out the pin from ball stud, remove the castle nut, and extract the ball stud from front arm.
4. Remove the bolt installing ball joint to housing.
5. Extract the ball joint from housing.
INSTALLATION
1. Insert the ball joint into housing.
Tightening torque (Bolt): 50 Nm (5.1 kgf-cm, 36.9 ft. lbs.)
CAUTION: Do not apply grease to the tapered portion of ball stud.
2. Install the ball joint into front arm.
Tightening torque (Castle nut)
Front arm: 39 Nm (4.0 kgf-cm, 28.8 ft. lbs.)
3. Retighten the castle nut further within 60° until the hole in ball stud is aligned with a slot in castle nut. Then, insert a new cotter pin and bend it
around castle nut.
4. Install the stabilizer bracket.
NOTE: Stabilizer bracket has an orientation, so install it with the arrow mark faced to the front side of vehicle.
Tightening torque: 25 Nm (2.5 kgf-cm, 18.1 ft. lbs.)
5. Install the front wheels.
INSPECTION