
Legacy Brighton Wagon AWD F4-2.5L SOHC (2000)
6) Check that valve rocker arm roller rotates smoothly. If not, replace valve rocker arm.
2. INTAKE AND EXHAUST VALVE ROCKER SHAFT
Visually check oil relief valve of shaft end for any of the following abnormalities.
^
Breaks in check ball body
^
Foreign particles caught in valve spring
^
Oil leakage at check ball
CAUTION: Repair or replace valve rocker shaft as necessary.
D: ASSEMBLY
1) Install adjuster screw and nut to valve rocker.
2) Arrange valve rocker arms, springs and shaft supports in assembly order and insert valve rocker shaft.
Tightening torque (Shaft supports installing bolts): 5 ± 1 Nm (0.5 ± 0.1 kg-m, 3.6 ± 0.7ft. lbs.)
CAUTION: Valve rocker arms, rocker shaft and shaft supports have identification marks. Ensure parts with same markings are properly
assembled.
3) Install valve rocker shaft securing bolts.
E: INSTALLATION
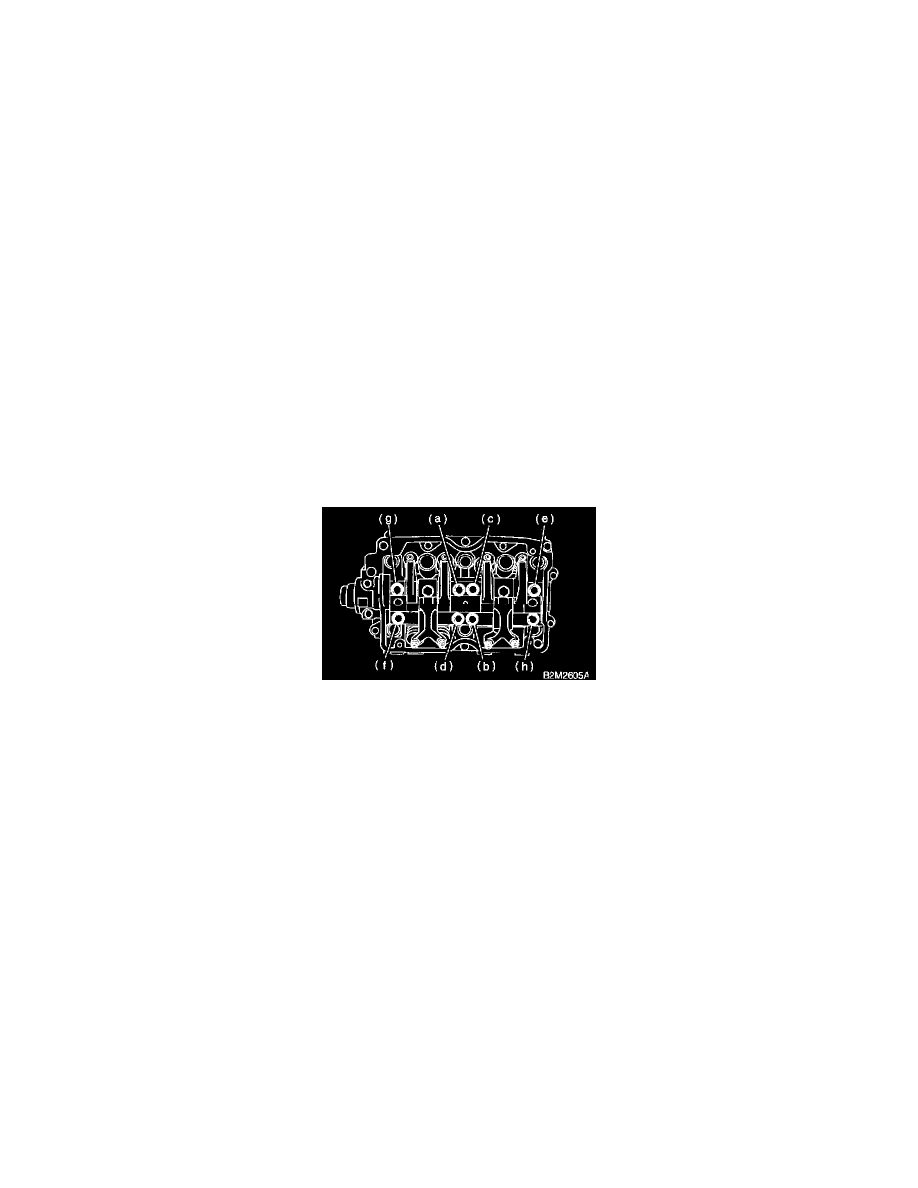
1) Installation of valve rocker assembly
(1) Temporarily tighten bolts (a) through (d) equally as shown in figure.
CAUTION: Do not allow valve rocker assembly to gouge knock pins.
(2) Tighten bolts (e) through (h) to specified torque.
(3) Tighten bolts (a) through (d) to specified torque.
Tightening torque: 25 ± 2 Nm (2.5 ± 0.2 kg-m, 18.1 ± 1.4 ft. lbs.)
2) Adjust the valve clearances.
3) Install rocker cover and connect PCV hose.