
Legacy Outback Ltd Sedan F4-2.5L SOHC (2000)
Windshield: Service and Repair
Removal
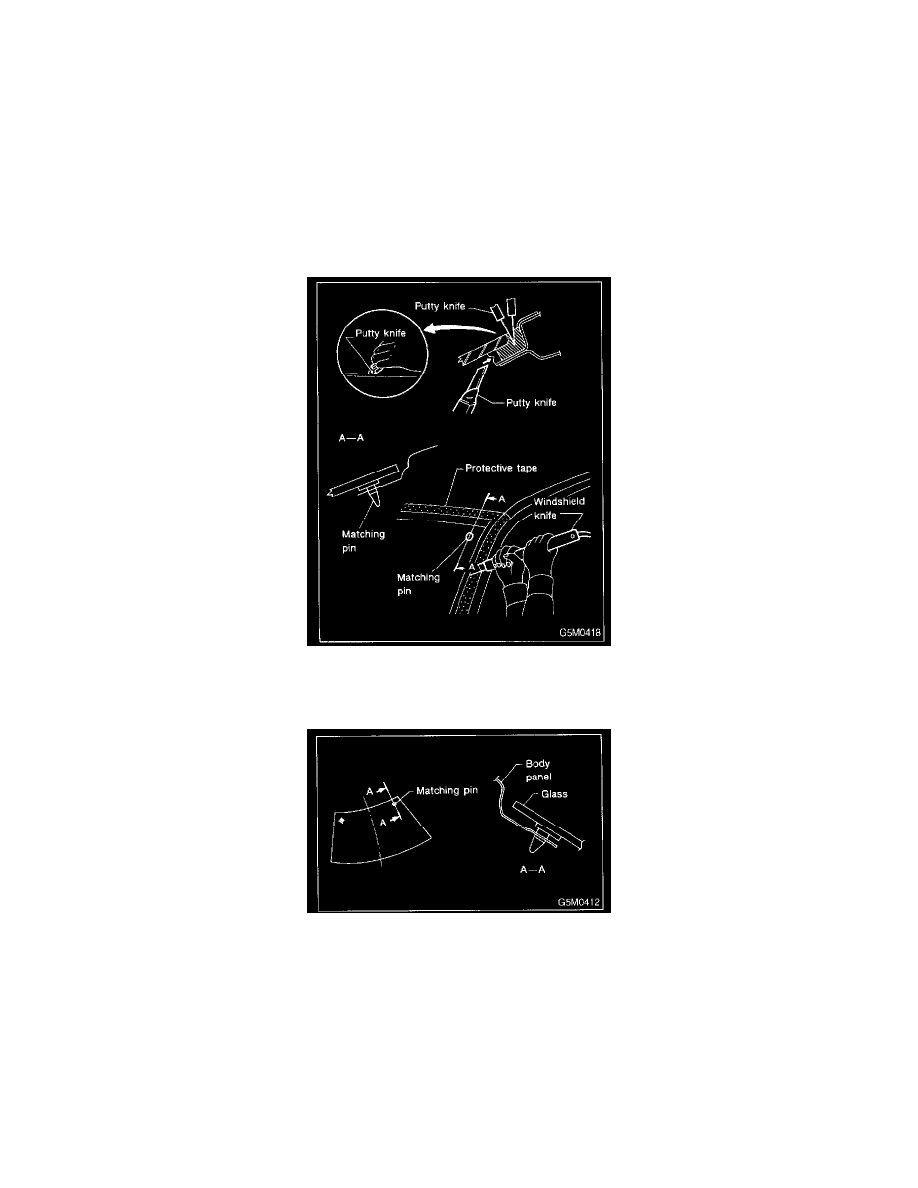
1. USING WINDSHIELD KNIFE
The following procedure for the front windshield can also be applied to other window glass.
1. Remove wiper arm and cowl panel.
2. Remove front side molding and front molding upper.
3. Remove glass:
1. Put protective tape on body to prevent damage.
2. Apply soapy water to the surface of the adhesive agent so the knife blade slides smoothly.
3. Cut off excess adhesive agent.
4. Put windshield knife into layer of adhesive.
5. Cut adhesive layer with the windshield knife.
CAUTION:
-
Keep knife edge along glass surface and end face.
-
When first putting knife into layer of adhesive, select point with wide gap between body and glass.
NOTE:
A matching pin is cemented to corners of glass on compartment side.
Use a piano wire when cutting each pin.
2. USING PIANO WIRE
1. Remove wiper arm and cowl panel.
2. Remove roof molding and front window molding upper.
3. Remove glass:
1. Put protective tape on body to prevent damage.
2. Using drill or putty knife, make through-hole (one place) in adhesive agent.