Legacy Sport Utility LTD AWD F4-2.5L DOHC (1999)

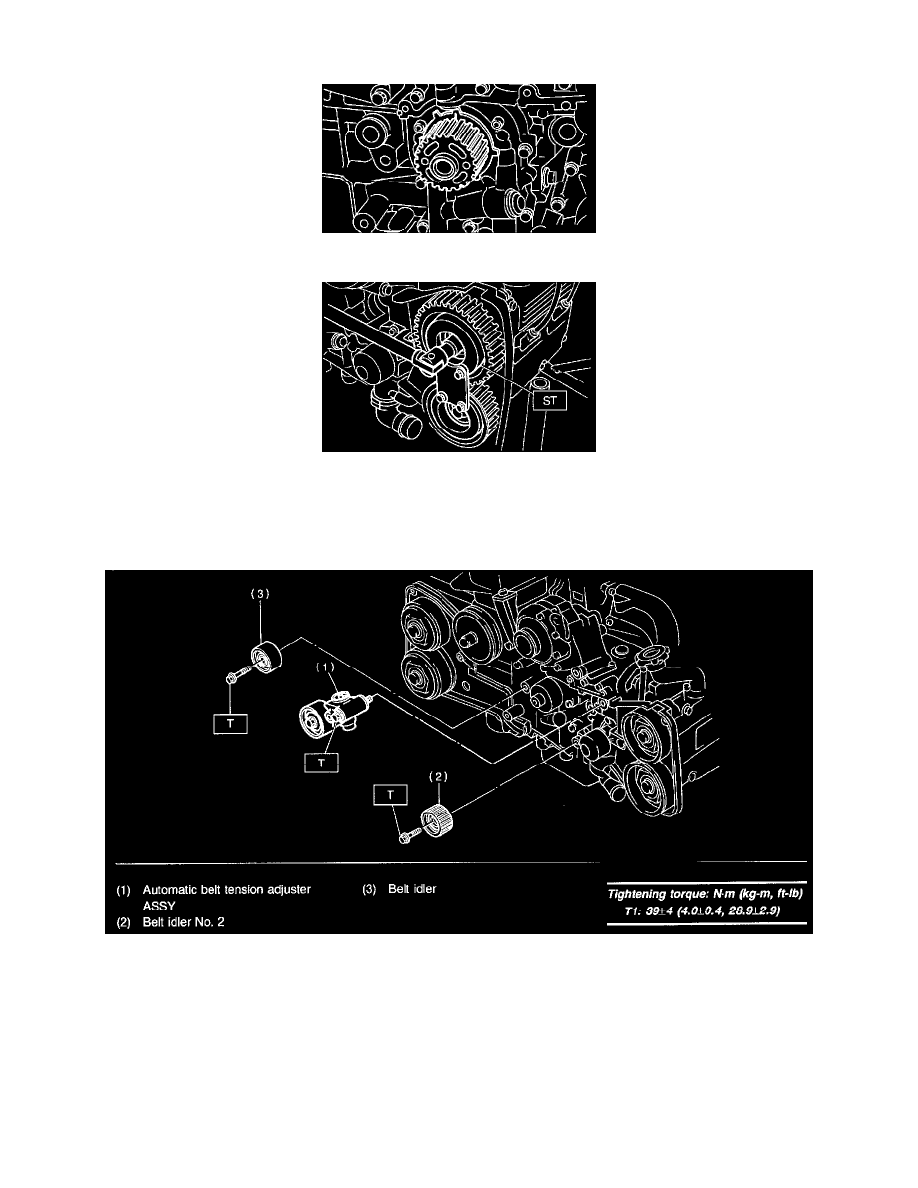
3) Install tensioner bracket
4) Install crankshaft sprocket.
5) Install right-hand exhaust camshaft sprocket. To lock camshaft, use ST.
6) Install right-hand intake camshaft sprocket using ST.
7) Install left-hand exhaust camshaft sprocket using ST.
8) Install left-hand intake camshaft sprocket using ST.
ST 499207300 CAMSHAFT SPROCKET WRENCH
2. AUTOMATIC BELT TENSION ADJUSTER ASSEMBLY AND BELT IDLER
1) Preparation for installation of automatic be~ tension adjuster assembly:
CAUTION: Always use a vertical type pressing tool to move the adjuster rod down. Do not use a lateral type vise. Push adjuster
rod vertically. Be sure to slowly move the adjuster rod down applying a pressure of 294 N (30 kg, 66 lb). Press-in the push adjuster
rod gradually taking more than three minutes. Do not allow press pressure to exceed 9,807 N (1,000 kg, 2,205 lb). Press the adjuster rod as
far as the end surface of the cylinder.
WARNING: DO NOT PRESS THE ADJUSTER ROD INTO THE CYLINDER. DOING SO MAY DAMAGE THE CYLINDER.
DO NOT RELEASE PRESS PRESSURE UNTIL STOPPER PIN IS COMPLETELY INSERTED.
