
SVX FWD L6-3.3L DOHC (1994)
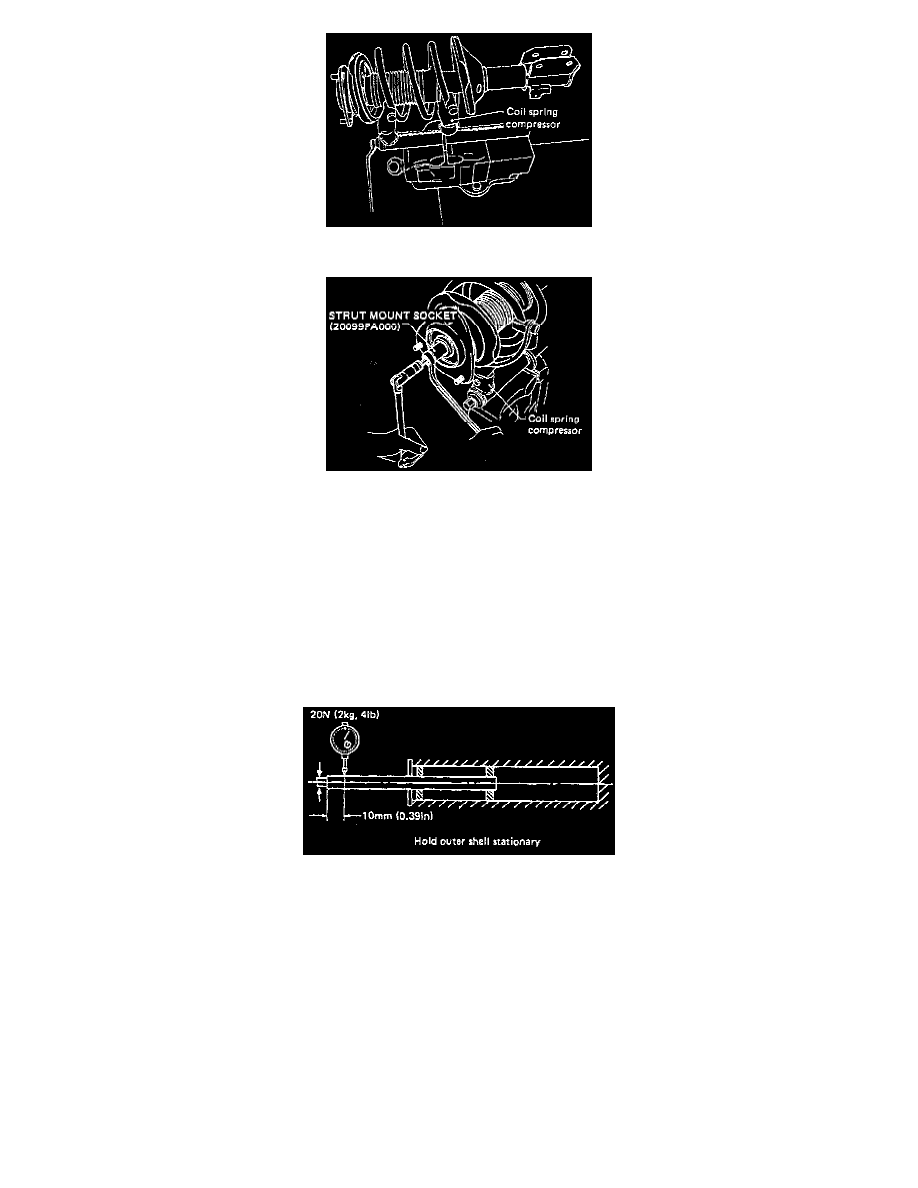
1. Using a coil spring compressor, compress coil spring.
2. Using strut mount socket, remove self-locking nut.
3. Remove strut mount, upper spring seat and upper rubber seat from strut assy.
4. While gradually decreasing compression force, remove coil spring.
5. Remove dust cover, helper spring and lower rubber seat.
INSPECTION
NOTE: Check the disassembled parts for cracks, damage and wear, and replace with new parts if defective.
1. Damper strut:
a. Check for oil leakage.
b. Move the piston rod up and down to check its operates smoothly without any binding.
c. Deflection of piston rod. Measure the deflection as follows: Fix the outer shell and fully extend the rod. Set a dial gauge at the end of the rod,
and apply a weight of ± 20 N (± 4 lbs.) to the threaded portion. Read the dial gauge indication. The amplitude of the gauge needle pointer is
the deflection of the rod. Limit of deflection: Less than 0.8 mm (0.031 inch). If the deflection is greater, replace the strut.
2. Strut mount:
a. Check rubber part for creep, cracks and deterioration, and replace it with new one if defective.
b. If distortion is found on its connecting surface to body, replace it with a new one.
3. Dust cover: If any cracks or damage are found, replace it with a new one.
4. Coil spring: One having permanent strain should be replaced with a new one. When vehicle posture is uneven, although there are no considerable
reasons like tire puncture, uneven loading, etc., check coil spring for its free length, cracks, etc. Replace it with a new one if defective.
5. Helper: Replace it with new one if cracked or damaged.
ASSEMBLE
1. Compress the coil spring.
2. Install lower rubber seat to the spring seat.