
Tribeca F6-3.6L (2008)
Hose/Line HVAC: Service and Repair
Hose And Tube
REMOVAL
CAUTION:
-
When disconnecting/connecting hoses, do not apply an excessive force to them. After installing,check that no torsion or excessive tension
applied to the hoses.
-
Seal the disconnected hose with a plug or vinyl tape to prevent foreign matter from entering.
1. FRONT
1. Disconnect the ground cable from the battery.
2. Using the refrigerant recovery system, discharge refrigerant.
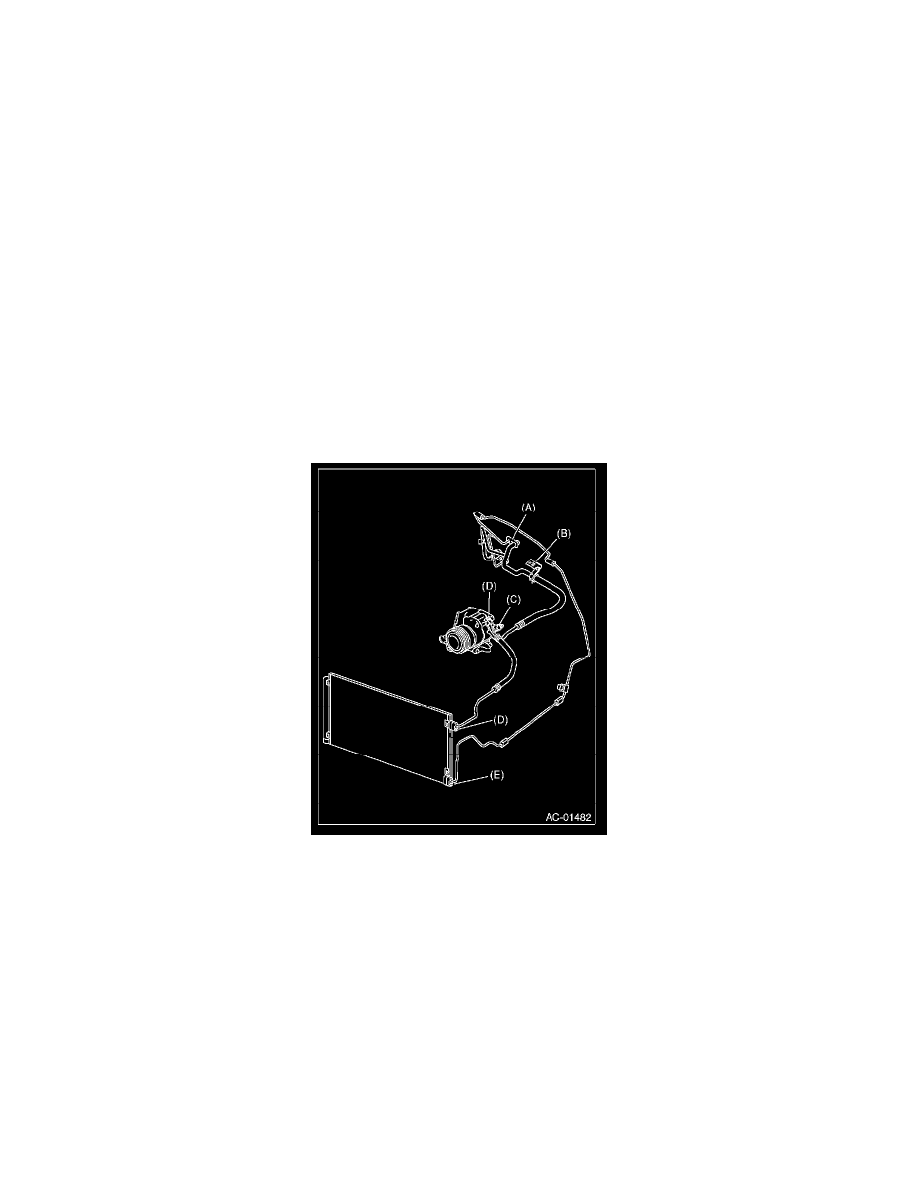
3. Remove the evaporator unit mounting bolt (A) and low-pressure hose bracket bolt (B).
4. Remove the low-pressure hose attaching bolts (C).
5. Disconnect the low-pressure hose from evaporator unit.
6. Disconnect the low-pressure hose from compressor.
7. Remove the low-pressure hose from vehicle.
8. Remove the high-pressure hose attaching bolt (D).
9. Disconnect the high-pressure hose from compressor.
10. Disconnect the high-pressure hose from condenser.
11. Remove the high-pressure hose from vehicle.
12. Remove the high-pressure tube attaching bolt (E).
13. Remove the high-pressure tube from vehicle.
2. REAR
1. Disconnect the ground cable from the battery.
2. Using the refrigerant recovery system, discharge refrigerant.
3. Remove the sheet and floor mat.
4. Remove the ECM bracket.
5. Remove the quick connectors (A and B).
ST REMOVER PS73499XA01A
ST REMOVER PD73499XA00A
NOTE:
Description for handling the special tool
1. Face collar side (A) of the quick connector (1) to the remover (2), and set lock part (B) on the stopper side (C) of the remover.