
XT-6 2WD L6-2.7L SOHC (1989)
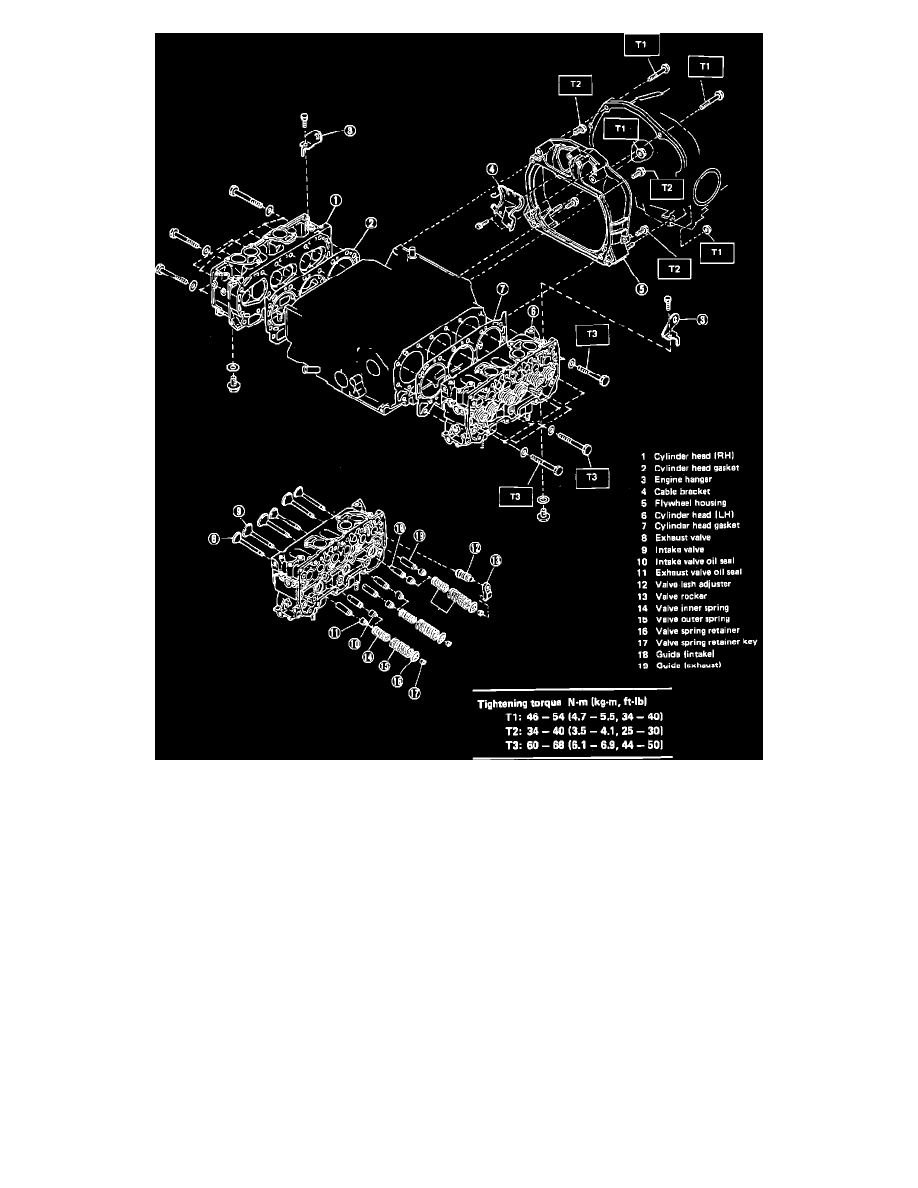
Fig. 22 Exploded View Of Cylinder Head & Flywheel Housing
1.
Disconnect electrical wiring, then remove distributor mounting bolt and distributor.
2.
Remove timing belt covers, timing belts and camshaft sprockets.
3.
Disconnect water pipe and PCV hoses, then remove rocker covers.
4.
Remove camshaft cases together with camshafts and supports, Fig. 19.
5.
Remove valve lash adjusters and rockers, Fig. 22, noting position so that they may be installed in same order. Ensure lash adjusters are placed
in upright position.
6.
Remove attaching bolts and camshaft support, then slide camshaft out of case.
7.
Remove oil relief plug, pipe, relief valve spring and relief valve.
8.
Press new seal into camshaft support using suitable tool, then install new O-ring.
9.
Install relief valve, spring, pipe and plug. Tighten to specifications.
10.
If camshaft is being replaced, install distributor drive gear onto camshaft using suitable press.
11.
Apply engine oil to camshaft journals, then slide camshaft into case.
12.
Coat camshaft support oil seal lip with engine oil, then install support and tighten to specifications.
13.
Install lash adjusters into cylinder head in their original positions.
14.
Apply grease to rockers, then secure rockers to adjusters and valves.
15.
Apply a 1mm bead of Three-Bond 1207B sealant or equivalent to groove of camshaft case, then install case. Tighten bolts to specifications.
16.
Apply engine oil to all sliding surfaces of camshaft and rockers, then install rocker covers and reconnect PCV hoses.
17.
Install camshaft sprockets, timing belts and center belt cover, then the oil filler duct and water pipe.